LINE
Before starting, please ensure that you are starting the LINE process outside of the following countries and regions: US, Singapore, UK, and EU. LINE does not support paid accounts in the aforementioned.
Signing up for the LINE Developers console
- Go to https://developers.line.biz/en/docs/liff/getting-started/
- Create a provider on the LINE Developers Console by selecting the Create an account option https://developers.line.biz/console/register?redirect=%2F
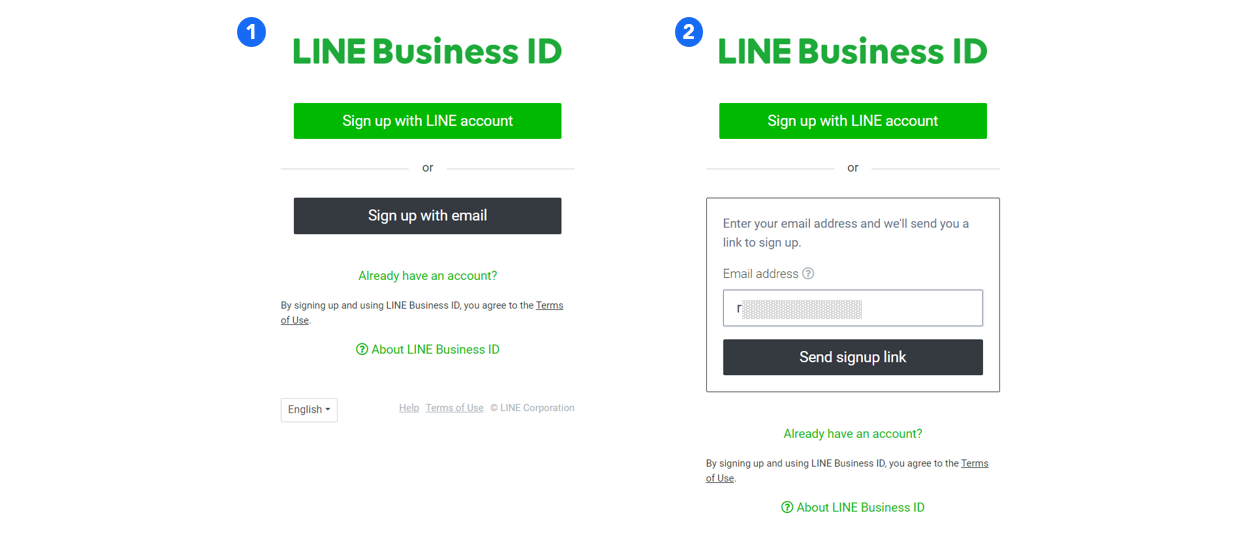
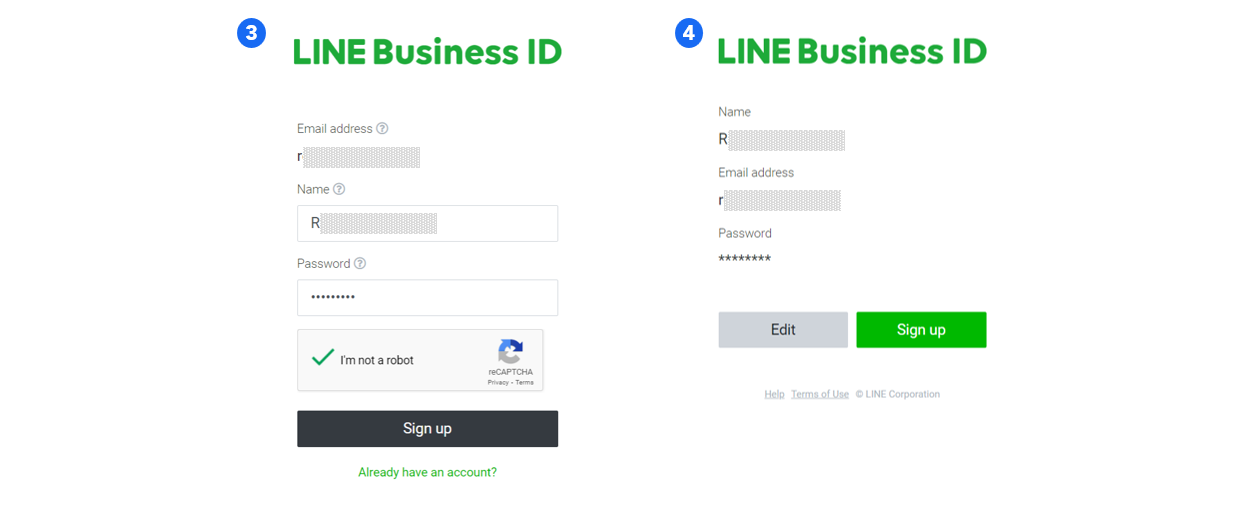
- Choose 'Sign up with email' and input your nominated email address in the corresponding field. You should then receive an email containing the signup link. Open the said email, then click the ‘Continue’ button found in the message and follow the next steps.
Creating a Developer Account
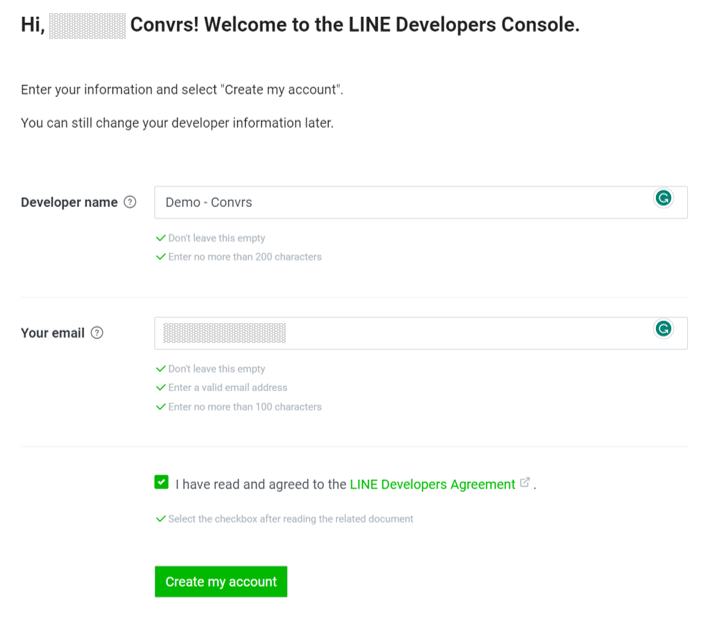
- Enter your name
- Enter your email
- Agree to the LINE Developers Agreement
- Click on ‘Create my account’
Setting up LINE
Provider
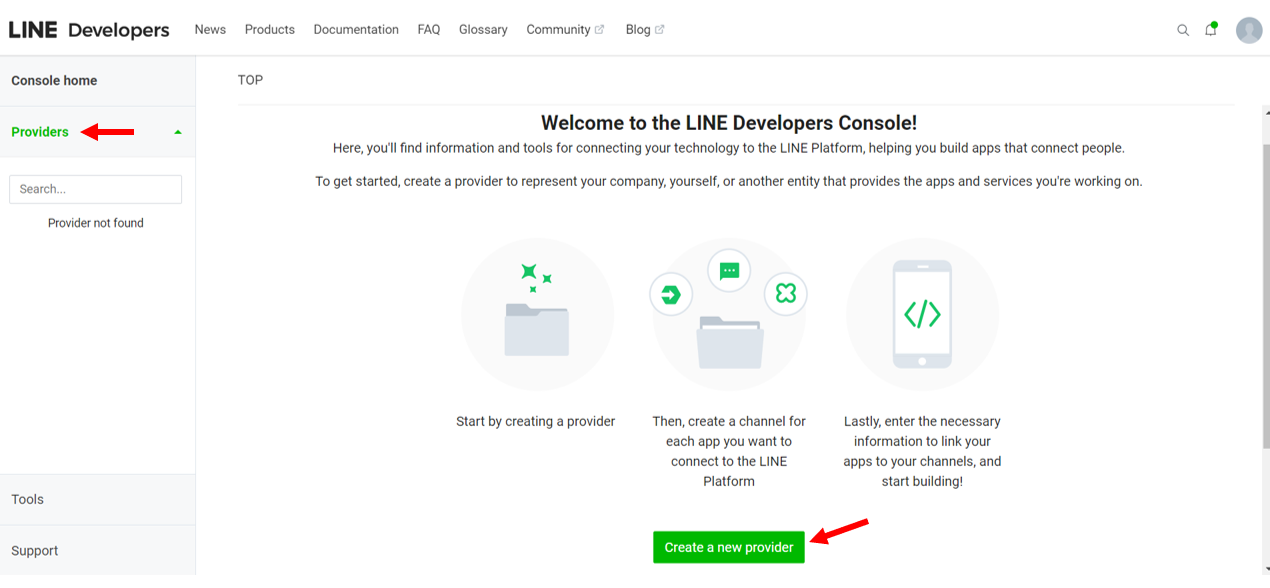
- On the Welcome Page, click ‘Create a new provider’
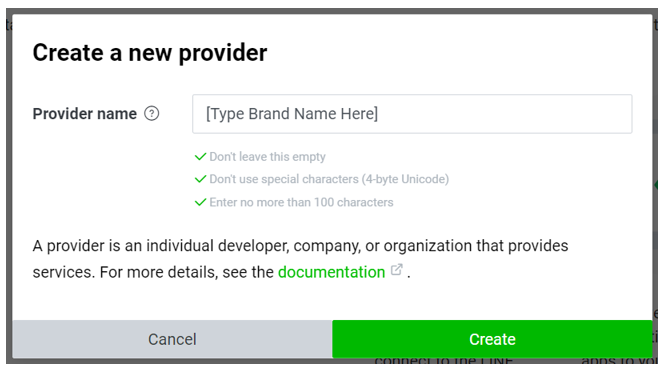
- Use your brand name as the Provider Name and click ‘Create’
Messaging API
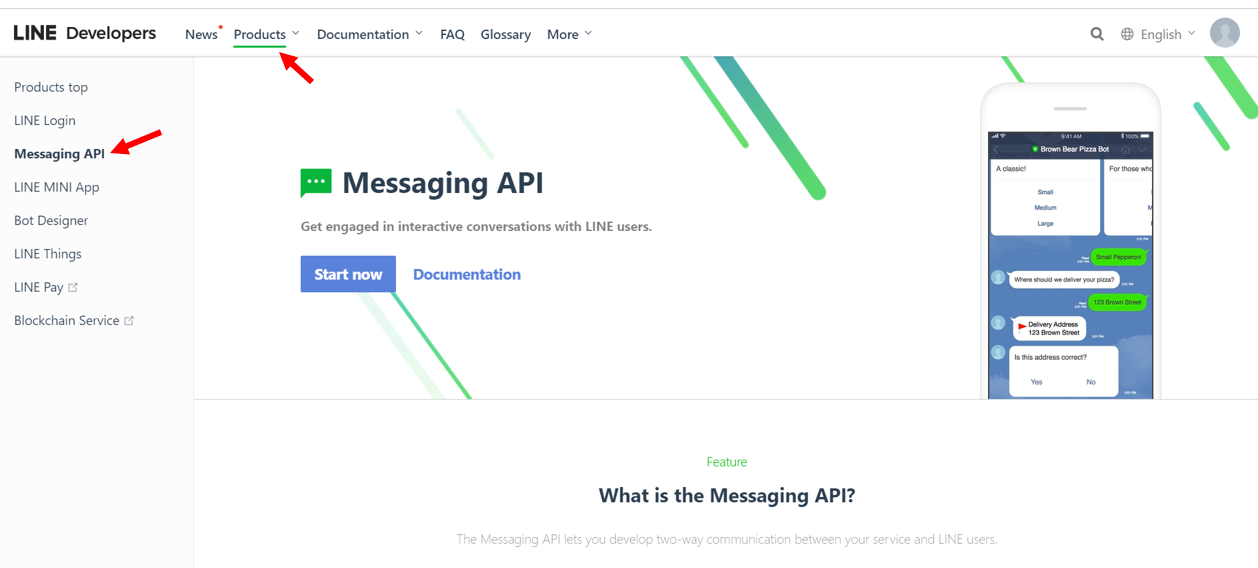
- Click on ‘Products’ found in the top menu
- Select ‘Messaging API’ in the left menu
- Click the ‘Start Now’ button
Create a Channel
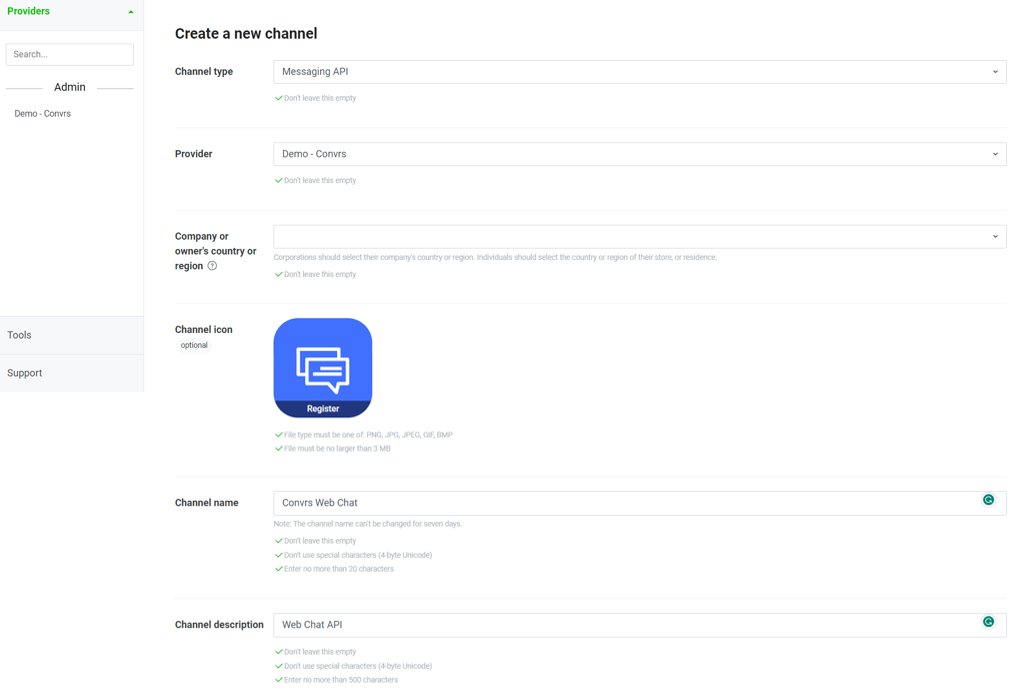
- Channel type should display Messaging API
- Provider - select the Provider you previously created
- Channel icon - upload your brand logo
- Channel name - we suggest ‘<Your Brand> Web Chat’
- Channel description - we suggest ‘Web Chat API’
- Category - select the appropriate Category
- Subcategory - select the appropriate Subcategory or choose ‘Other’ at the bottom of the list
- Enter email address and then click the ‘Create’ button
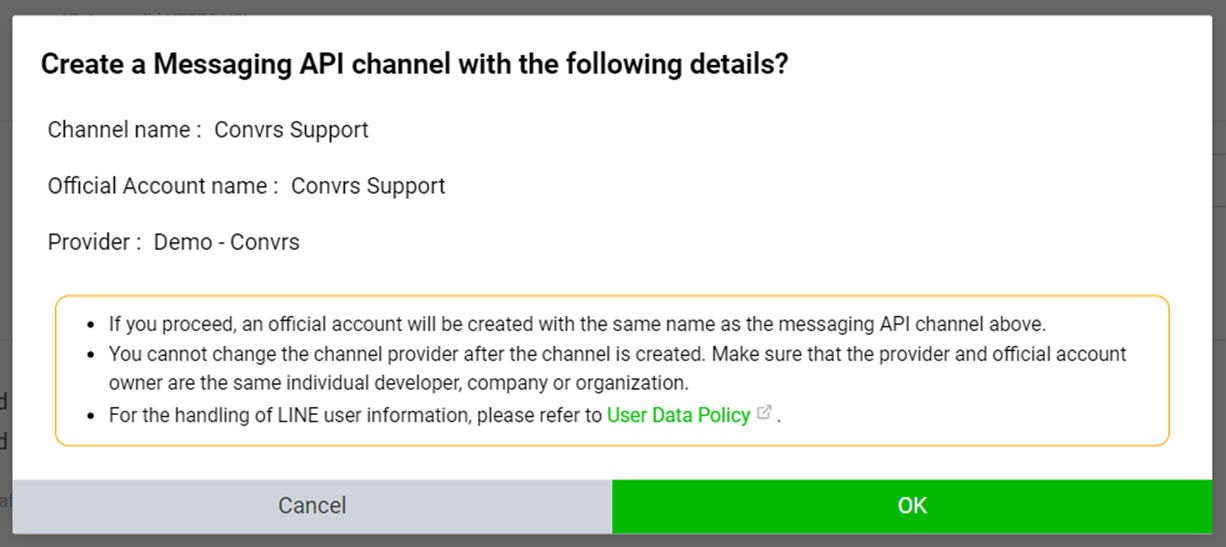
- A notification window should appear. Take note of the reminders and click ‘Ok’
Channel Access Token
- Scroll down to the Channel secret portion under Basic Settings, then copy and paste the secret key to a notepad for use in the following steps

- Scroll up and go to the Messaging API tab found below the top menu
- Scroll down to the Channel access token portion and click on the black 'Issue' button
- Copy the Channel access token to a notepad for use in the following steps

Create LINE Bot in Convrs
- Login to the Convrs dashboard
- Go to 'Bots' in the left-hand menu
- Click ‘Create New Bot’ and look for the LINE logo and click on 'Create New'
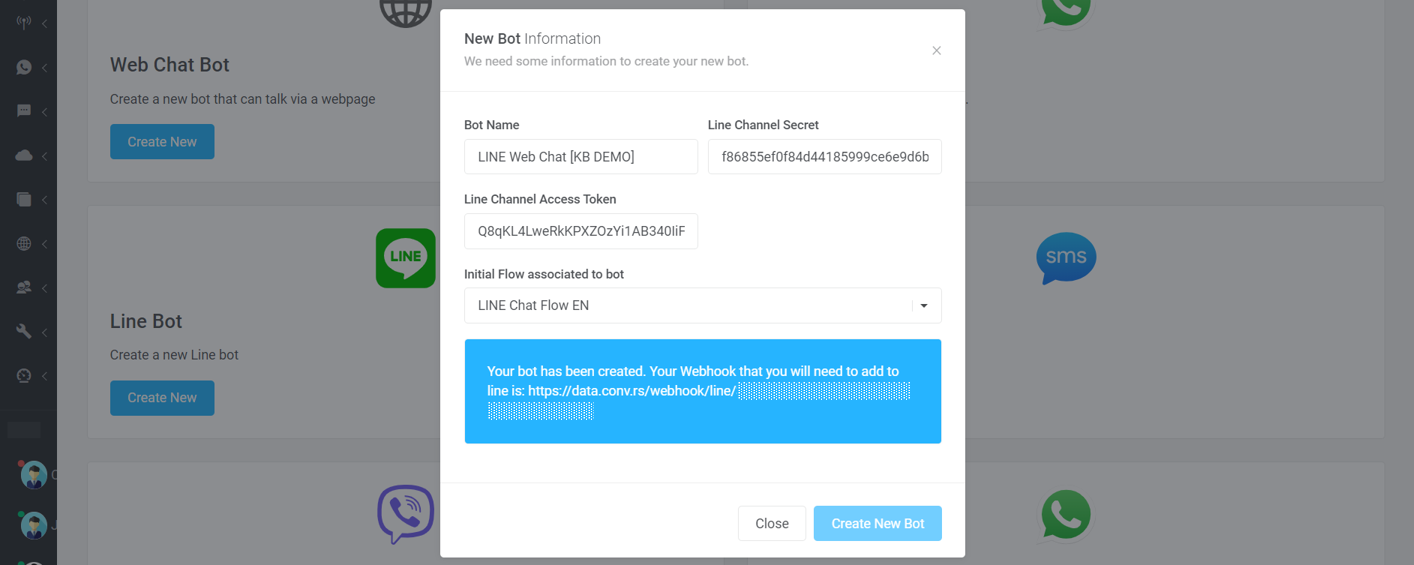
- Paste the LINE Channel Secret Key and Channel Access Token in the fields provided
- Name the bot such as "LINE Web Chat" and select the flow you want to associate with the bot
- Click on 'Create New Bot'

Webhook for LINE Console
You will be provided with a webhook that you should copy and paste into a notepad for use in the LINE Developer Console.
Edit Webhook Settings
- Go to the Webhook settings on the LINE Developer Console under Messaging API, and click 'Edit.'
- Paste the webhook URL issued when creating the bot in Convrs into the field and click 'Update' and then Verify (wait for the 'Success' notification pop-up). Afterward, please toggle ON the 'Use webhook.'

Adding LINE to Web Widget
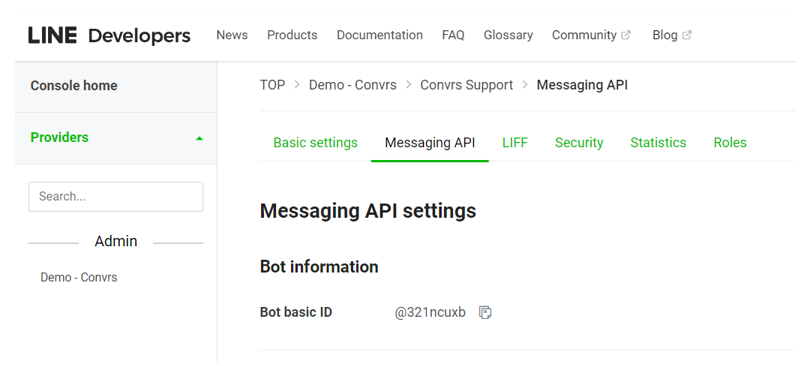
- Copy the Bot basic ID under Messaging API tab in the LINE Developer Console, and add it to the following URL https://line.me/ti/p/~
2. Go to the Convrs dashboard and go to Web Widgets in the left-hand menu. Click 'Edit' for the relevant web widget in which you want to use LINE.
3. In the Convrs dashboard web widget settings, paste the complete URL from Item 2 above, including the Bot basic ID, e.g., https://line.me/ti/p/~@321ncuxb
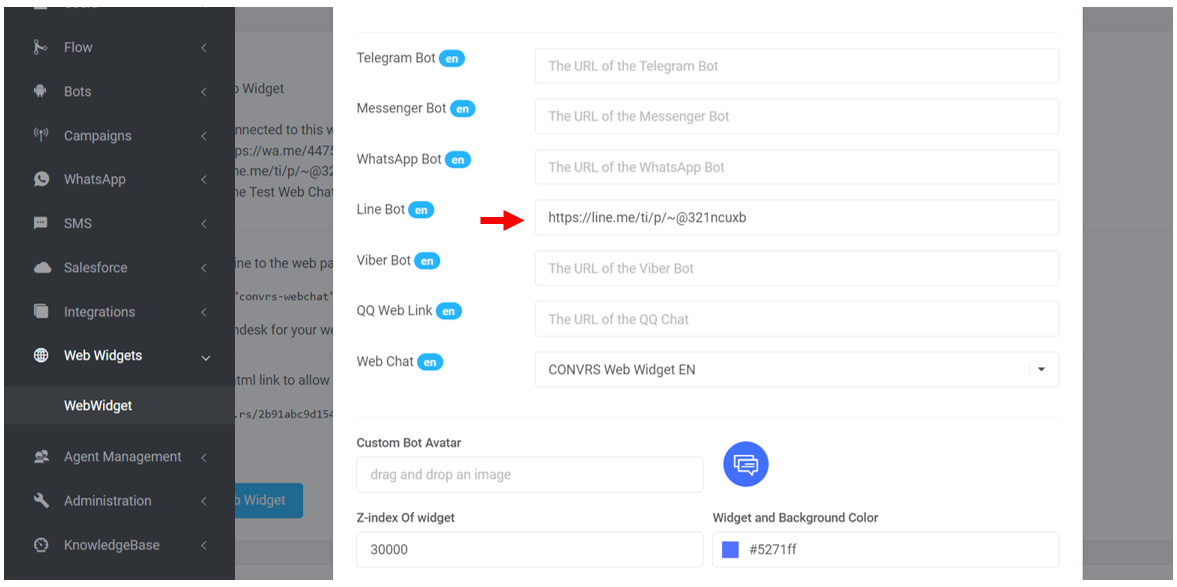
4. Once done, click on 'Update Web Widget.'
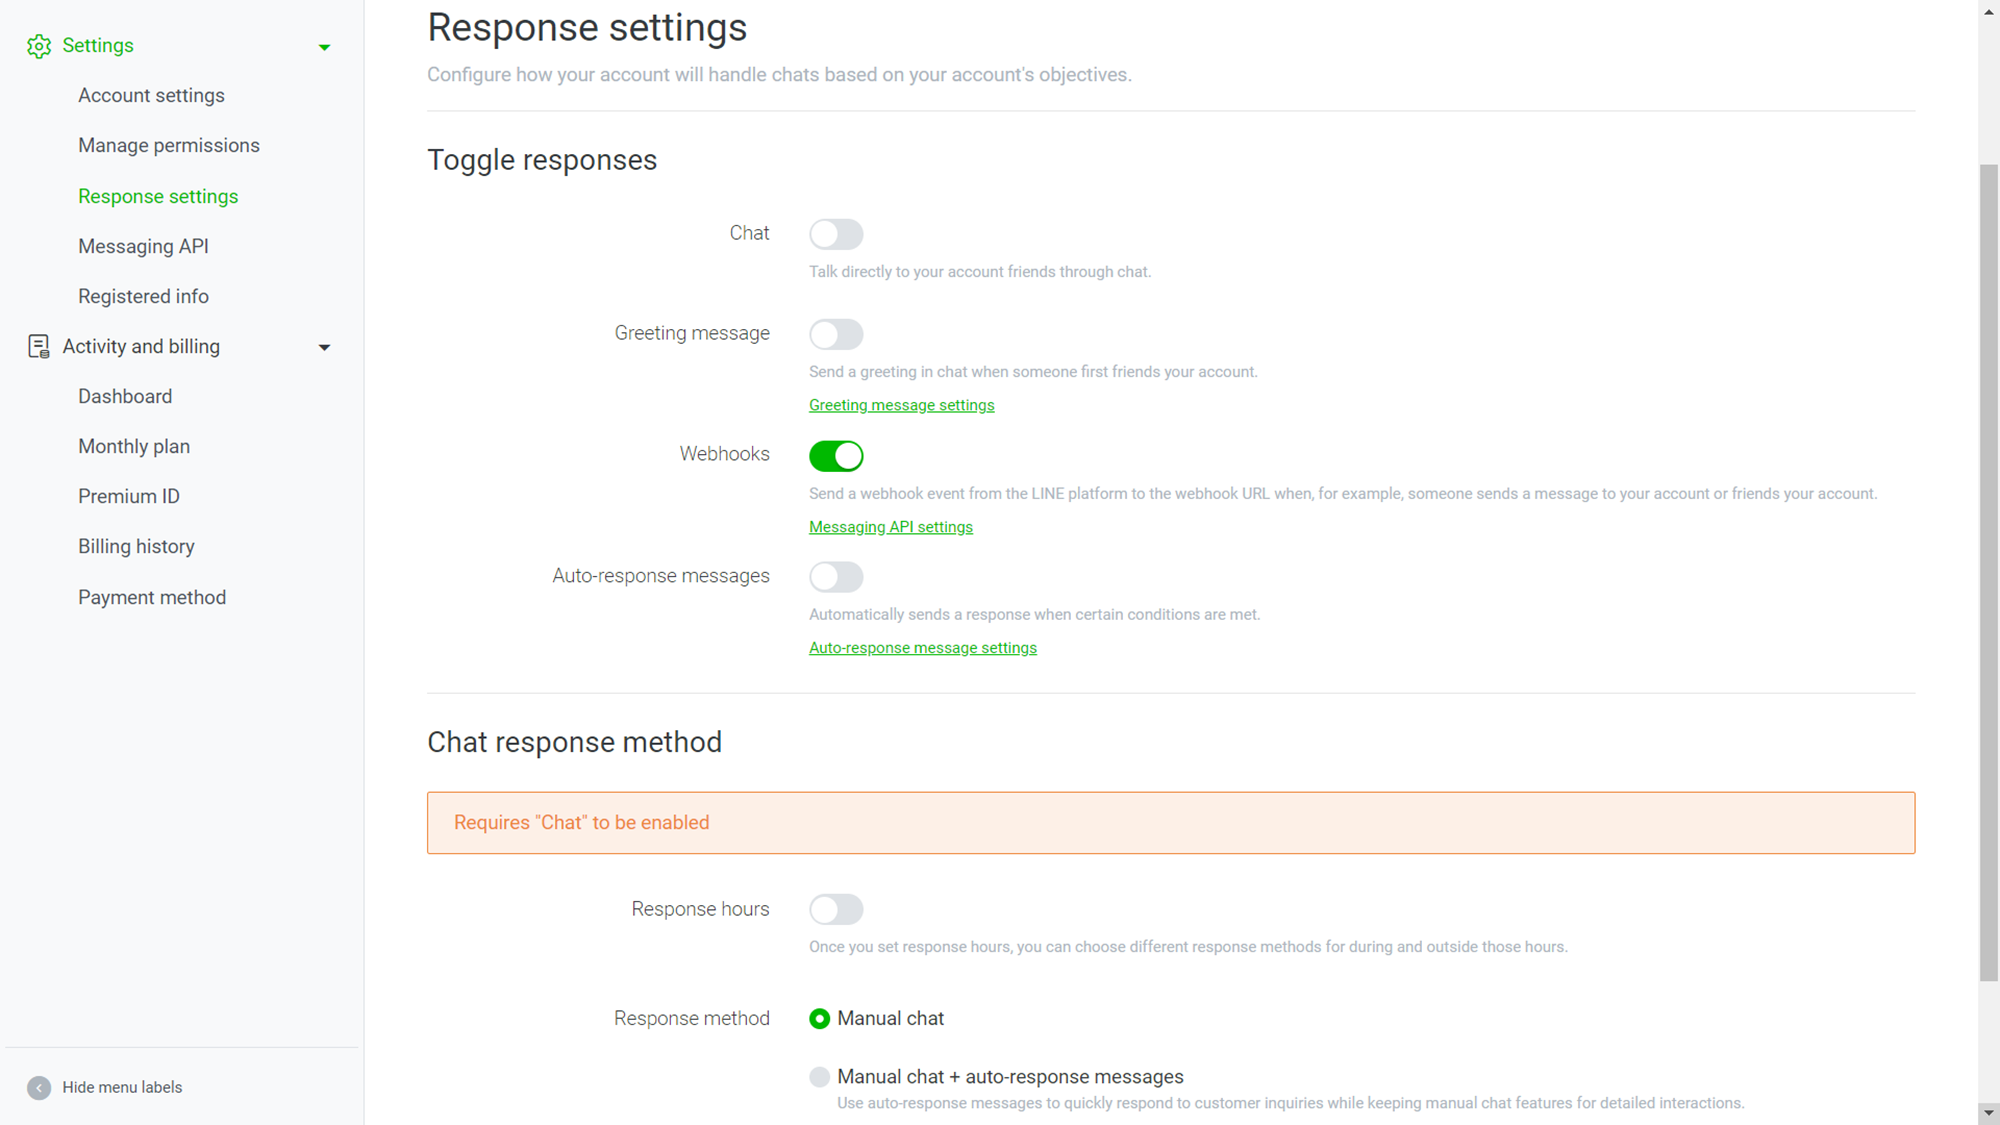
Turn off Auto-Reply Messages and Greeting Messages
Go to the Messaging API tab in LINE Developer Console and scroll down to Auto-reply messages. Click on 'Edit.'

A new tab will open, and you will need to change the settings as per the image below.
Reminder for LINE Subscription Plans
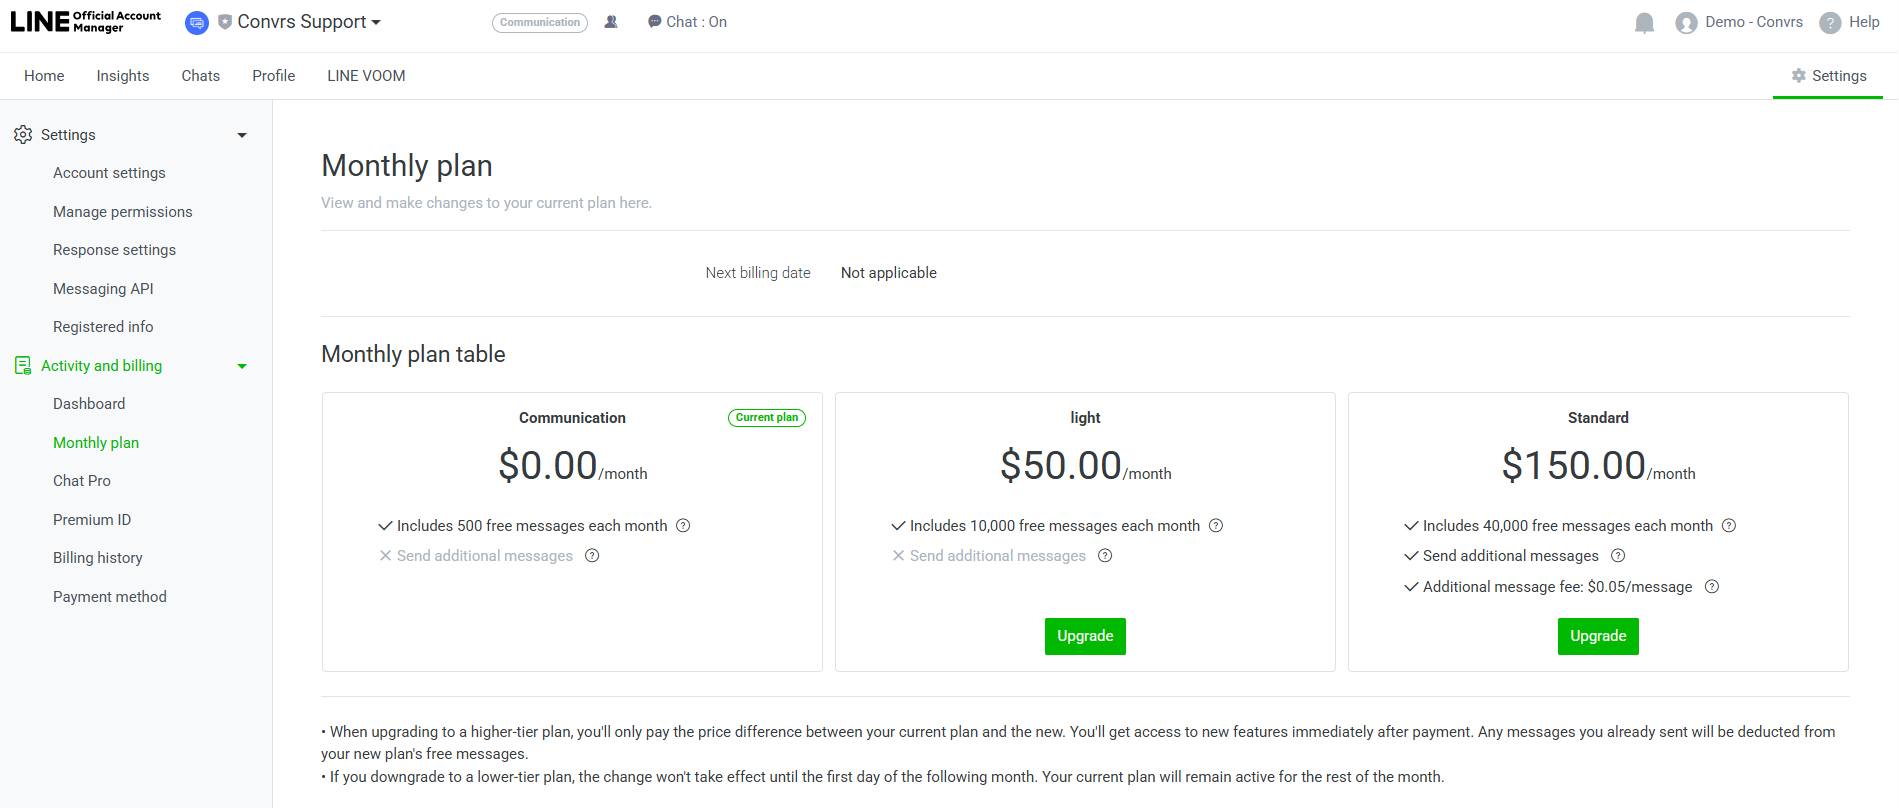
- For Free LINE accounts, there is a monthly limit of 500 free messages that can be sent. You may need to consider upgrading to a Light or Standard LINE monthly plan depending on the number of messages you would be sending.
- To check your LINE account subscription, go to https://manager.line.biz/ then click on the corresponding Channel Web Chat that you created.
- Click on the 'Activity and billing' module in the left-hand menu and click 'Monthly plan.'
- The Monthly plan table and corresponding prevailing LINE fees are also shown on the same page for reference.
