Salesforce
This guide explains how Convs and Salesforce are connected and configured.
How Convrs connects to Salesforce
Convrs uses the Salesforce REST API via a “Connected App” and OAuth 2.0 to authenticate.
Your Salesforce administrator should create a new Salesforce user for Convrs use only. This user should have the minimum level of access required.
As each Salesforce production environment is different, the required level of permissions necessary for the Convrs user depends on the level of integration between the two platforms.
Convrs is an event-driven architecture, and an integration point is always an event. As a default, the following events are available:
- onUserCreate - fired when a new user is created
- onUserRead - fired when an agent within convrs wants information about the user
- onUserUpdate - fired when something has been updated about the user
- onUserDelete - fired when a user has been deleted
- onUserEnable - fired when a user is enabled
- onUserDisable - fired when a user has been disabled
- onUserConverstation - fired when a conversation between an agent and the user has finished
For example, when a new user arrives in Convrs, it will trigger the onUserCreate event, which can then check to see if this user exists within Salesforce and, if it doesn’t, create a new contact if required.
As each event handler inside Convrs can run its own logic on a per bot basis, the integration between Salesforce and Convrs can cover simple and complex business logic.
Creating a Salesforce Connected App
Create a new Salesforce user for Convrs use only.
Log into your Convrs instance with appropriate admin permissions and enable the Salesforce integration:
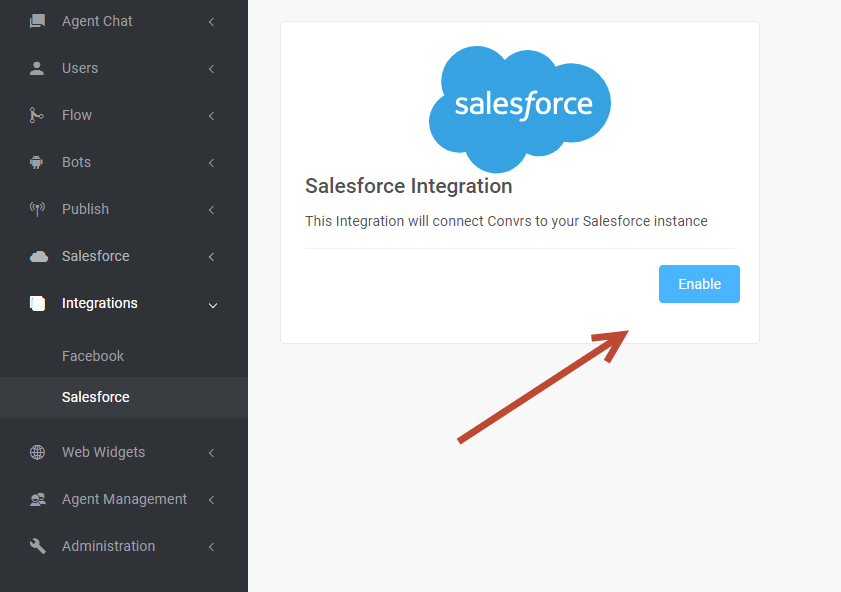
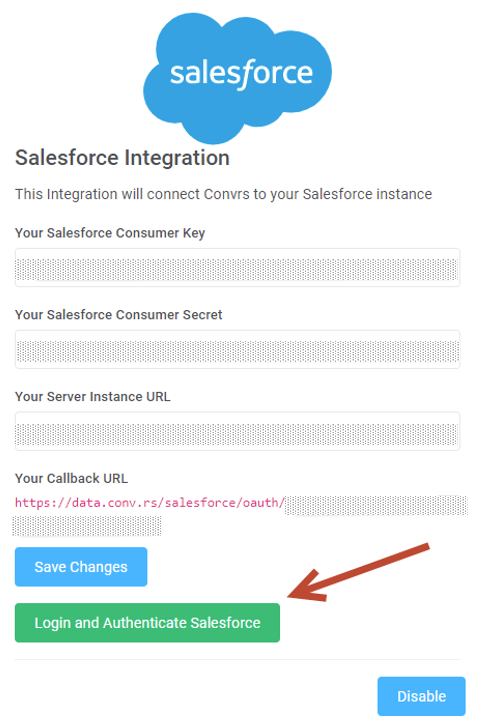
Once enabled, you’ll end up with the following screen.
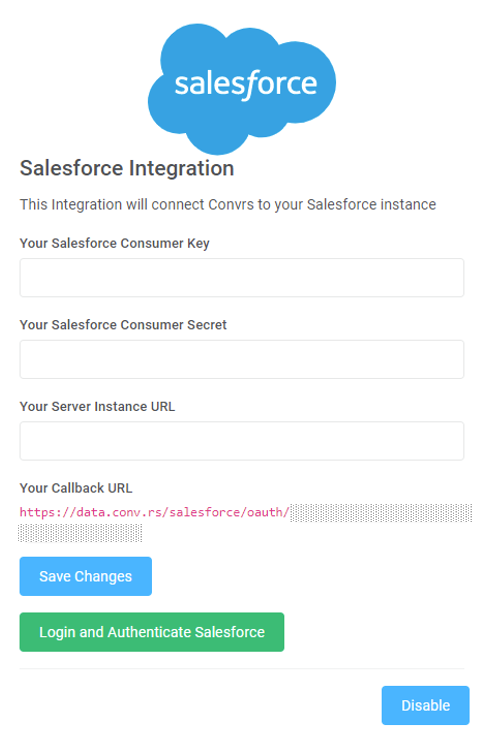
You must use the Callback URL when creating your Salesforce Connected App. Once the App has been created, you will need to provide the Salesforce Consumer key, Salesforce Consumer Secret, and Server Instance URL on this screen.
Now, log in to your Salesforce instance with appropriate admin permissions to create a connected App (Note: This is not the user for Convrs use).

Click on New Connected App
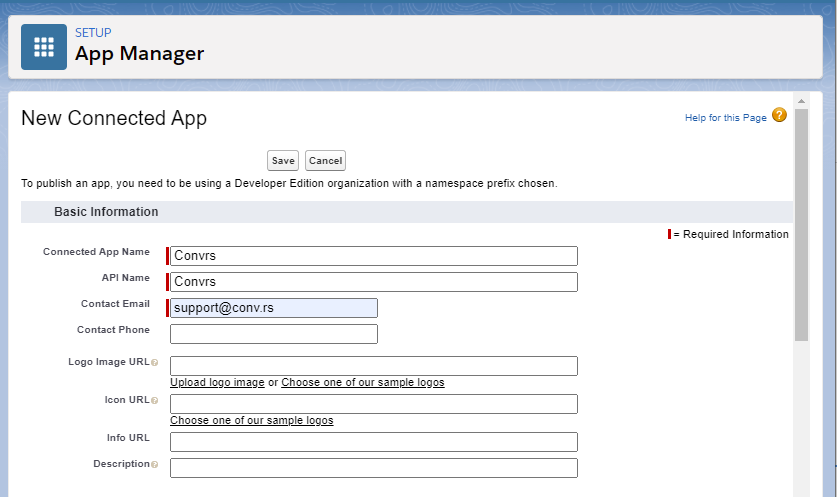
Populate the basic details of the app as above. Scroll down to the API (Enable Oauth Settings) and click the check box.
In the selected OAuth scopes, make sure that you choose the following:
Access and manage your data (API)
Perform requests on your behalf at any time (refresh_token, offline_access)
If you are using Winter ‘22 or later, you should choose the following:
Manage user data via APIs (api)
Perform requests on your behalf at any time (refresh_token, offline_access)
All other scopes can be turned off/removed.
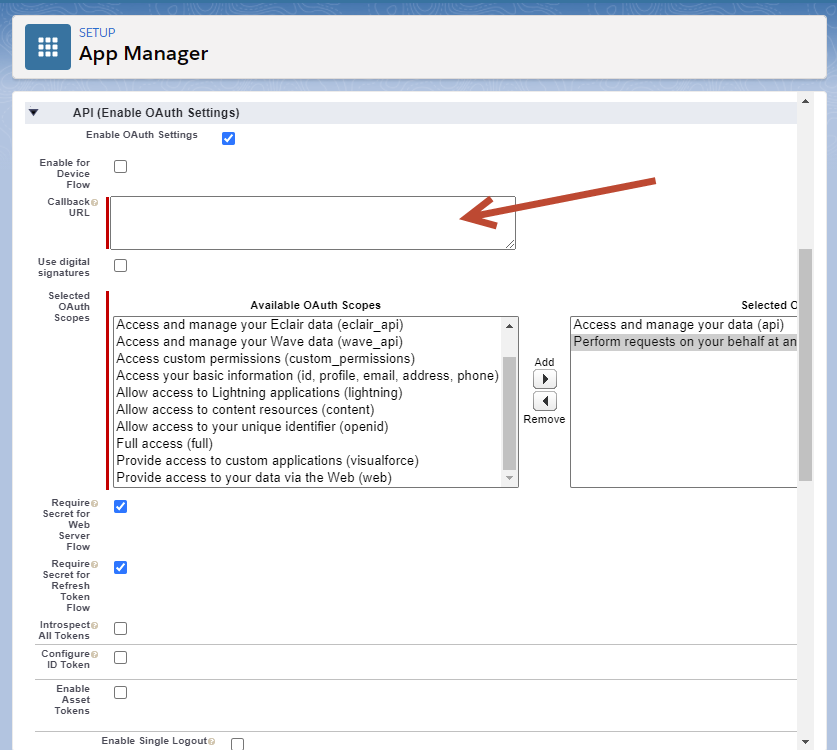
In the callback URL, enter the Convrs callback URL from above. Now, click on Save.
You will need to wait for 2-10 minus for the changes to take effect. Click on Continue.
You’ll now be on the Manage Connected App screen for the App you have created.
Now copy the Consumer Key into the Convrs Salesforce Consumer Key and the Consumer Secret into the Convrs Salesforce Consumer Secret. Populate the Salesforce Instance URL with your Salesforce URL.
Click to save changes.
We now need to edit the policies for the Connected App.
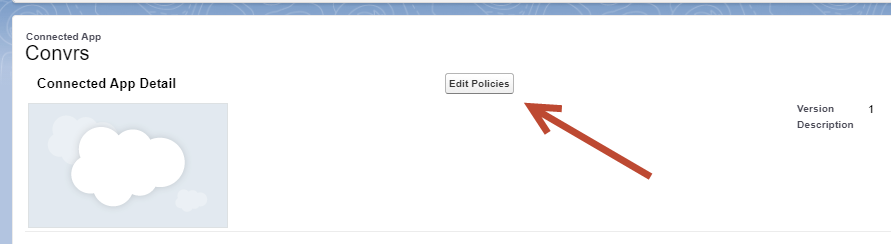
For IP Relaxation, change the drop-down to “Relax IP Restrictions.”
For Refresh Token Policy, change it to “Refresh Token Is valid Until Revoked”

Save your changes.
Now click on Login and Authenticate Salesforce within Convrs:
A new window will open, and you’ll be asked to log into your Salesforce instance. You should use the Salesforce account that was set up for Convrs use only. You will be shown a screen similar to the one below:
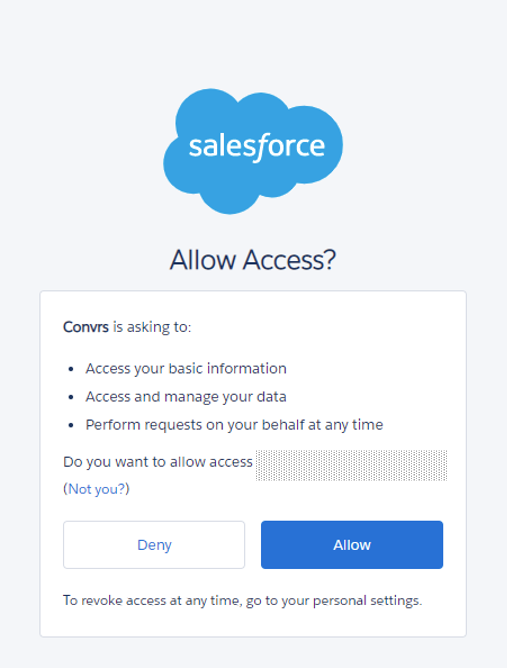
Click on allow, and you should get a message:
“You have connected Convrs to Salesforce. You can close this window.”
You have now connected Salesforce to Convrs.