Chatbot Flow Tools
Before starting, make sure that you've read the Create New Flow page to learn more about message intent and the flow limitations.
Available tools to create and edit a flow
When you press the Edit button on the Show All Flows page, you will be directed to the page where you can work on the flows. Below are the following tools available to use.

- Connect Message
- Delete Connection between messages
- Delete Message
- New Text Message
- New Keyword Menu Item
- New Message Containing a Web Link
- New Message Containing an Image
- New Message Routing to Agent
- New Message Requesting Phone Number or Email
- Command to Call when Flow is Embedded in a Third-Party Object
- New Message Containing a Logic Block
- New Message Containing a Logic Block with User Input
- New Message Containing a Route
- Edit Message Content
- Center canvas
- Zoom
- Default Messages
- Global Settings
- Save Flow
Create a simple flow
Let's say that you want to build a simple web chat flow where it should greet the user, ask for their phone number and email address, and then they are routed to an agent.
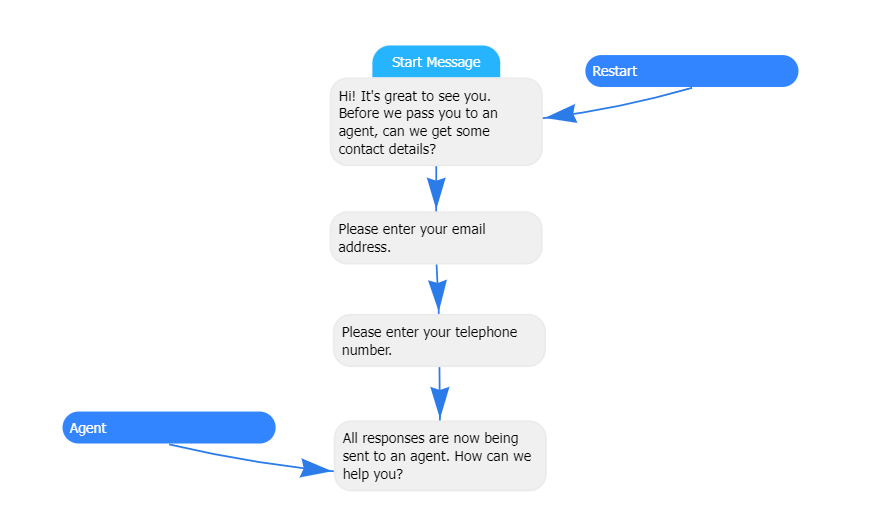
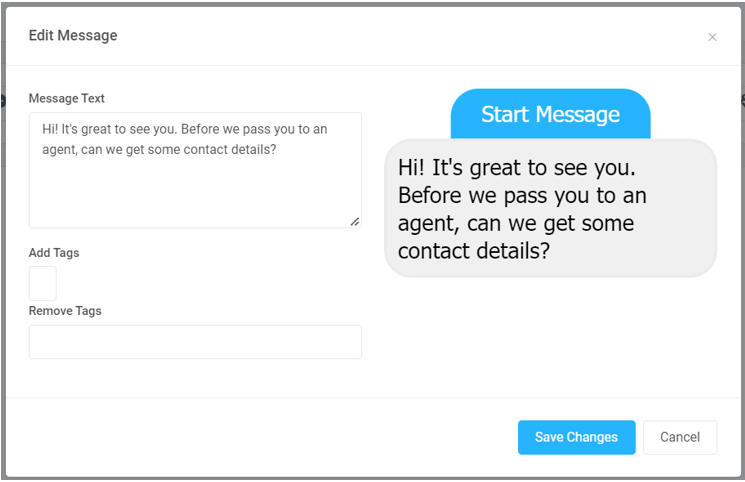
A default start message is shown on your canvas when you open a newly created flow. Double-click the grey message to edit and input the copy you want. Click on Save Changes.
Press the New Message Requesting Phone Number or Email icon on the toolbar and click anywhere on the canvas to place the message. Double-click on it to edit its contents. Once saved, press the first message, click on the Connect Messages icon and drag the mouse from the first message onto the second. A blue arrow should appear.
Repeat the same steps with the phone number message.
Press the Routing to Agent icon to add a trigger that when a user sends a message after the aforementioned prompt it will allocate it to an agent. Connect this to the previous message.
If you want to edit the Routing to Agent message, you may do so via the Default Messages icon.
Adding keywords can also help the user navigate their experience with the bot. For example, let's add the keywords, Restart and Agent. The experience we want to happen is when a user types ‘restart’, it will return to the start of the flow, and when they type ‘agent’, it will trigger the Routing to Agent message. To do so, click on the Keyword Menu Item icon, and edit accordingly. Connect it to the part of the flow you want to direct it to.
Press the Save Flow icon once done.
Add links to the flow
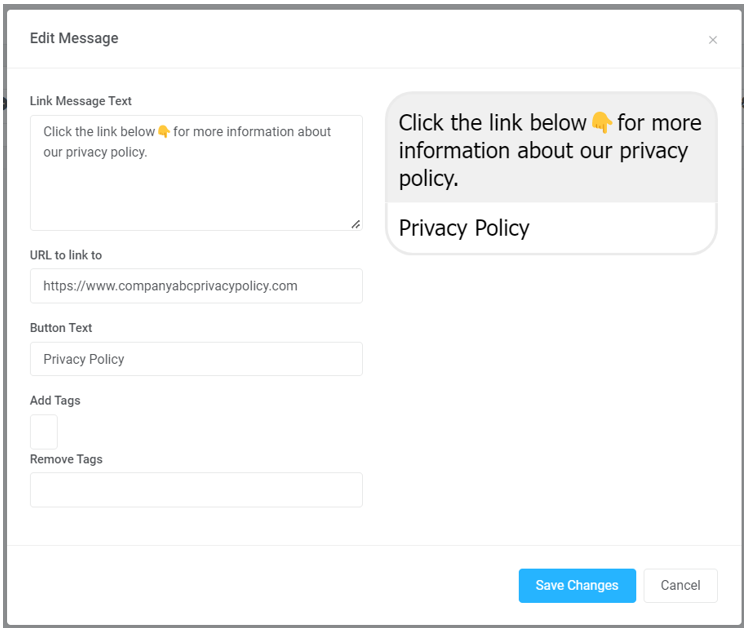
When adding a link, click on the New Message Containing a Web Link icon and edit the necessary details. Once done, press the Save Changes button, and connect the message to the previous one. Press the Save Flow icon on the main tools menu when everything is final.
Add options or buttons to the flow
Let's say after asking for the user's contact details, you want to ask them if they want to view your privacy policy, or to talk to an agent.
Create a simple text message (A) that acts as a message menu. After doing so, create a new web link (B), and routing to agent messages (C).
Connect the message menu to the message that will be your first option or button (A to B). After which connect the message menu to the second option or button (A to C).
Double-click on the message menu and toggle the Quick Reply button. Edit the button names accordingly and remember to keep them as short as possible. Once done, press Save Changes button, and press the Save Flow icon on the main tools menu.
Routing to agent chat sending to different business units
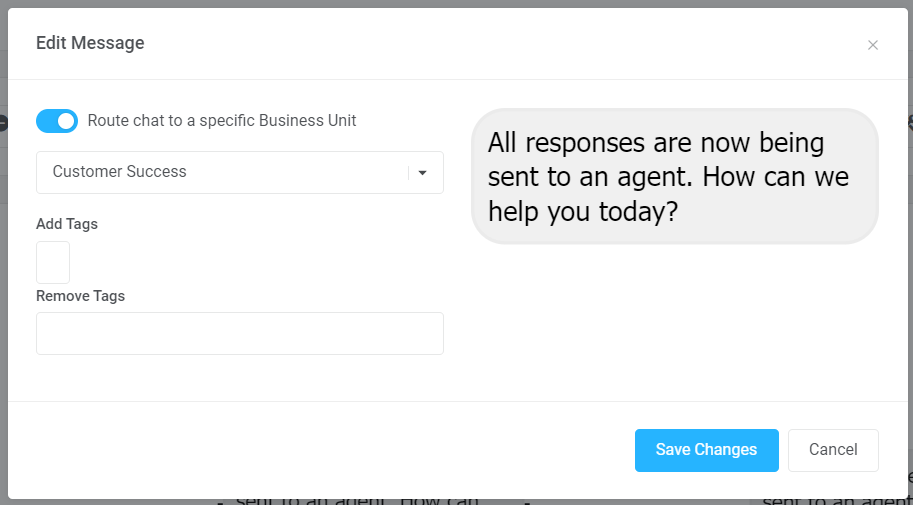
With a more complex flow, you are able to define a more specific process as you see fit. For example, on the web chat, you want active accounts to go to the Customer Success team while new accounts should be directed to Sales. To do so, create two new routing to agent messages, and connect them to your message menu.
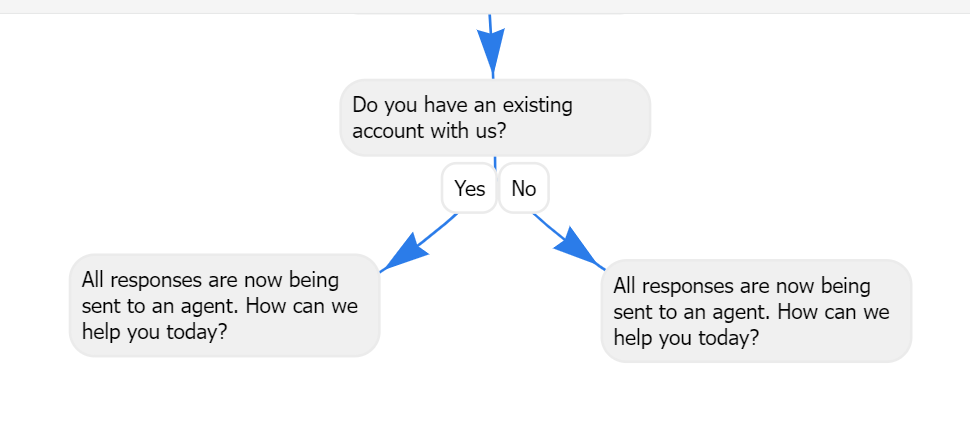
Click on the first routing to agent message indicating Yes. Toggle on ‘Route chat to specific Business Unit’ and choose the associated Business Unit you want it to be allocated. In this case, Customers Success. Press Save Changes.
Do the same for the second routing to agent message. This time, choose the Business Unit, Sales. Once done, press Save Changes, and press the Save Flow icon on the main tools menu.
Edit a current flow connected to a bot
Once a flow is connected to a bot and live, we strongly recommend you create a copy of the existing flow for editing especially if you will be doing significant changes. This way it will not disrupt or even break anything.
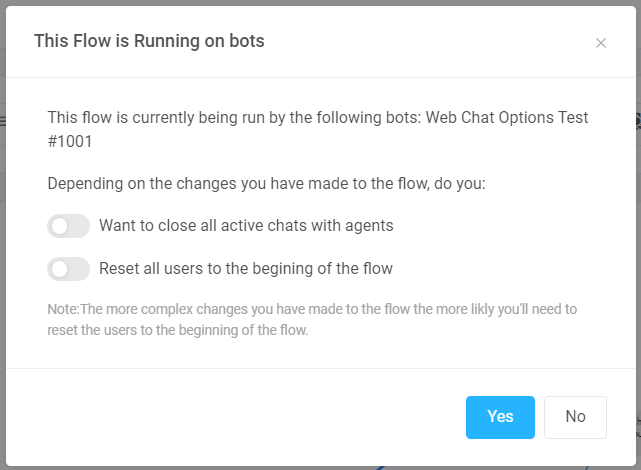
However, if minor changes are to be made, continue to do so on the existing flow. A prompt will appear when you click on the Save Flows icon. If these are simple changes, you may leave the options untoggled before pressing the Yes button.
[RO211122v1]
[RO060723v2]