Create and Manage an Agent
Create a New Agent
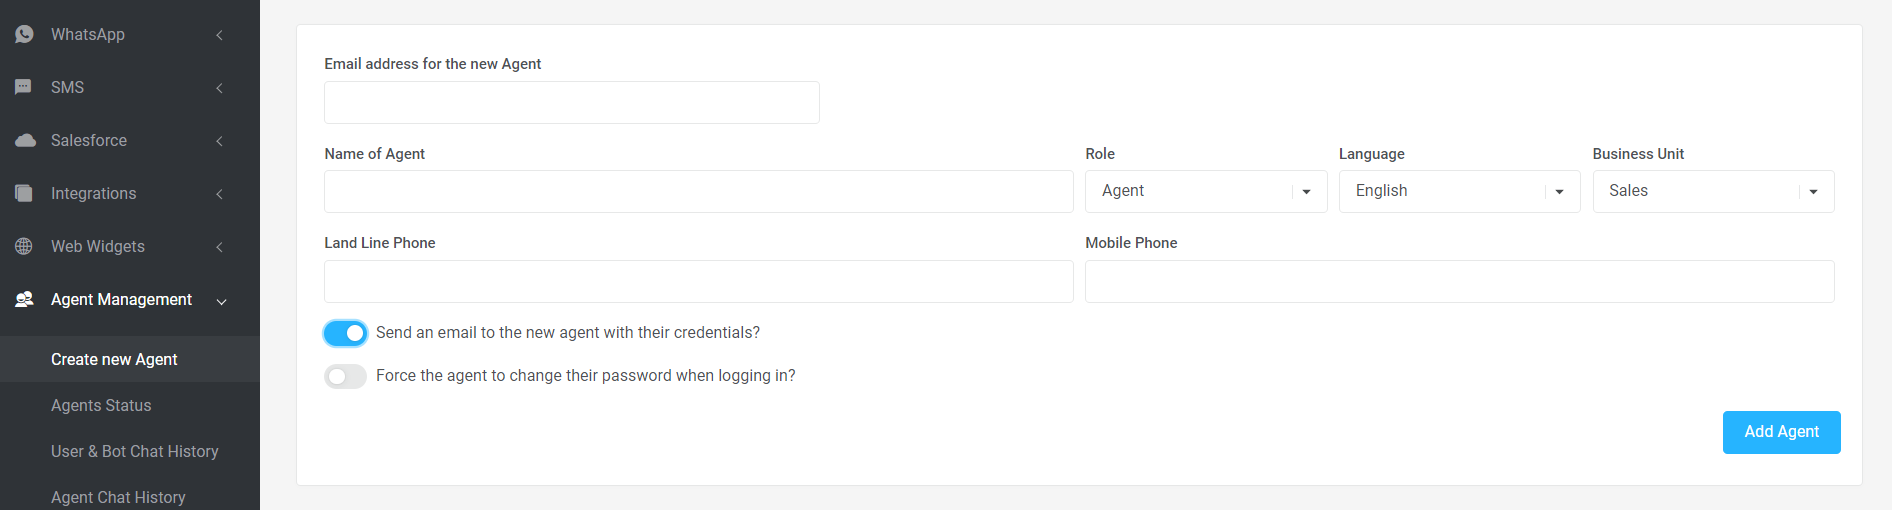
The following information is required when creating a new agent in the dashboard:
- Email address: This will serve as their user login. Ensure to input it correctly, with no spaces before or after the email address. This cannot be edited.
- Agent's Name: The name will be reflected in the dashboard. The agent can edit this on their own.
- Role in the dashboard: This will determine the allowed permissions their role has in the dashboard. They can be any of the following functions: Agent, Agent Manager, Client Manager, Marketing, Compliance, etc.
- Language: This will determine the language for the auto-translate function. Only one language is allowed.
- Business Unit: Only one business unit is needed when creating a new agent. Additional business units may be set after the agent has been made in the dashboard.
- Landline and mobile phone numbers are optional fields. Remember to toggle the ‘Send an email option so the agent may receive their login credentials.
Once ready, go to your Convrs dashboard > Agent Management > Create New Agent and fill in the info shown below then hit “Add Agent”.
IMPORTANT NOTES:
- Toggle the ‘Send an email' option so the agent may receive their login credentials.
- If the agent is part of multiple dashboards, they need different emails for each.
Edit Agent Details
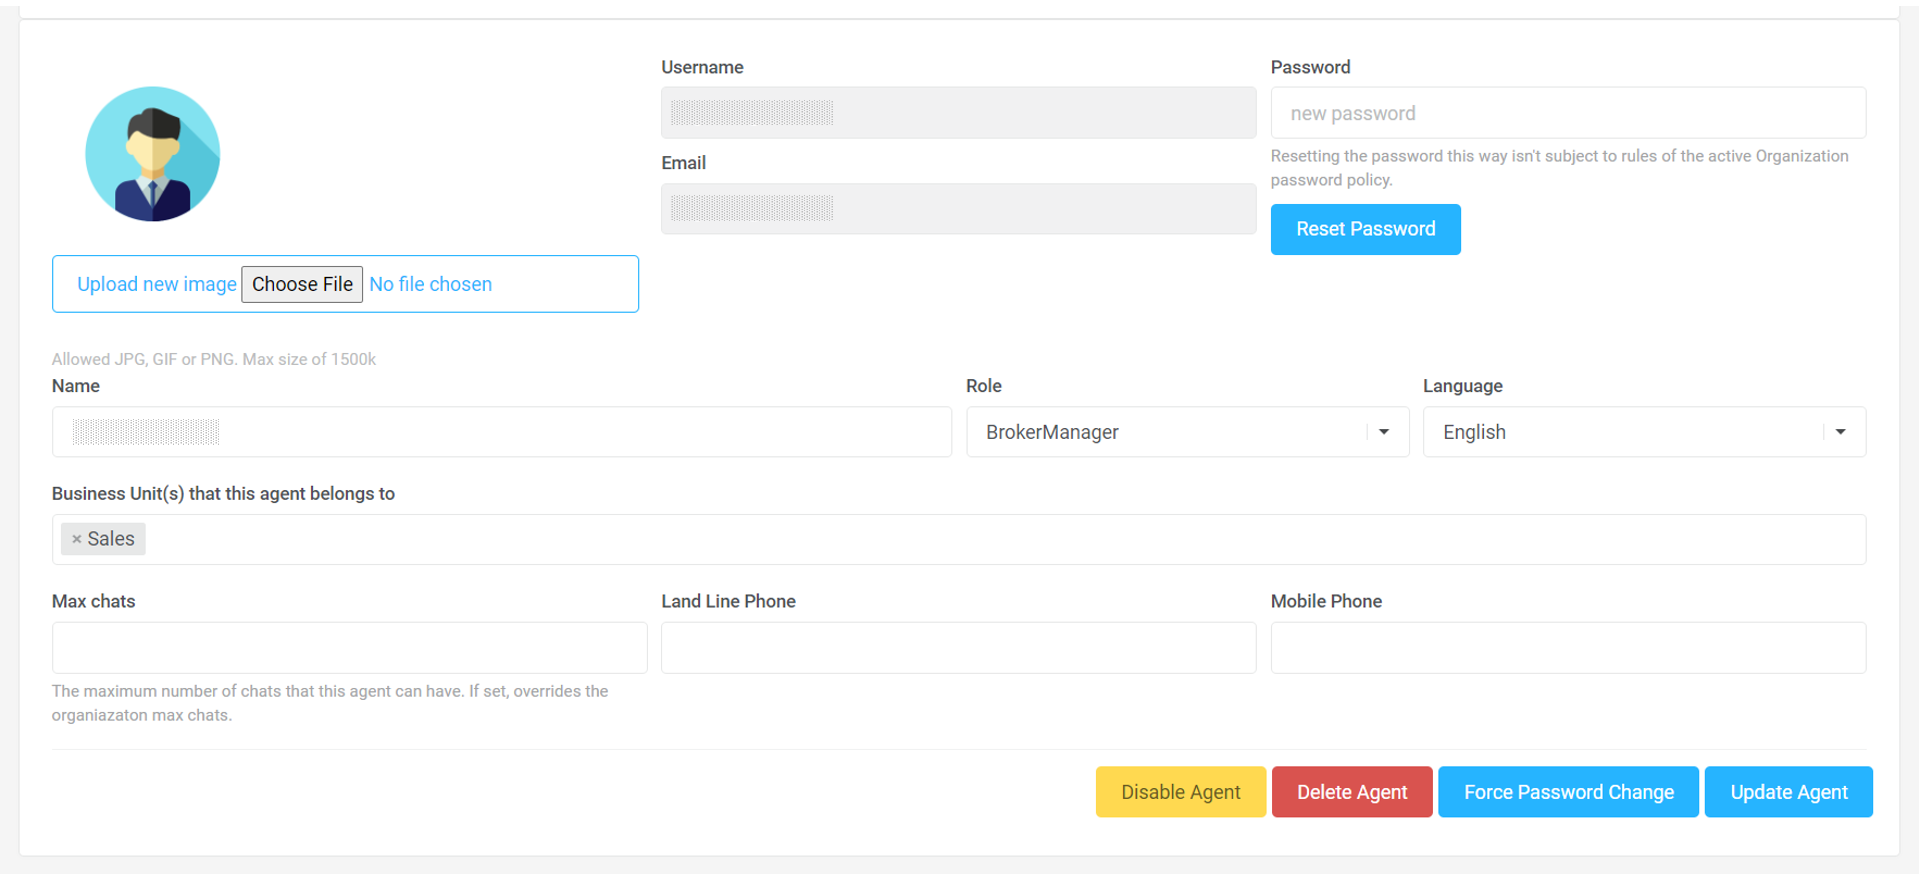
On the top half, you will have access to an overview of all the agents created within the dashboard. Once you click on a particular agent, you can modify their name, role, language, business unit, and a maximum number of chats and reset their password.
Click on the agent you want to edit. Alternatively, you may type in their name or email on the search bar.
Below are the fields you can edit as an Admin user.
- Password: Reset the agent's password at any time. If the reset is done through the Manage Agent page, it is not subject to the rules set through the Organization password policy. Alternatively, you may enact a Force Password Change on the agent by pressing the associated button.
- Name: The name set on this page will be reflected on the dashboard and web chat - unless the agent adds a Public Name on their profile management page, then that public name will be one that the user will see on their web chat window.
- Role and Language: Update the agent's role and primary language on this page.
- Business Units: When creating an agent's login access, you can only input one business unit. Add the other business units they may be part of here.
- Max Chats: Override an individual agent's maximum chat set on the organization level.
- Landline and Mobile Phone: These fields are optional.
Once done, press the Update Agent button.
Disabling an Agent Profile
When an agent leaves, you may disable their access by pressing the yellow Disable Agent button. It is highly recommended to NEVER delete an agent. Simply disabling their account will prevent them from accessing the dashboard, but their conversations will remain intact.
Sometimes, when the agent has active conversations or if some of the users are sticky to them, the system will ask you to close or transfer these chats and unstick the users before disabling their accounts. You may do so under the Agent Status page.
Sticky Chats of a Disabled Agent Profile
Disabling their access will prevent them from accessing the dashboard, but their conversations will remain intact. Sometimes when the agent has active discussions or if some of the users are sticky to them, the system will ask you to close or transfer these chats and unstick the users before disabling their accounts. You may do so under Agent Status.
[RO141122v1]
[JC161122v1]