Agent Chat
The Agent Chat interface is where you communicate with customers in real-time. This is your primary workspace for handling customer conversations, viewing user information, and managing your active chats.
Interface Layout
- Chat List (Left Panel) - Shows all your active conversations, sorted by preference.
- Conversation Area (Center) - Displays the chat messages with the selected customer.
- User Details Panel (Right) - Shows customer information, notes, and quick actions. Available based on permissions.
Note on PermissionsSome features described in this guide may not be visible or accessible to you depending on your role and permissions. Features marked with Permission Required are only available if enabled by your administrator.
Interface Overview
The Agent Chat interface is divided into three main panels that work together to help you manage customer conversations efficiently.
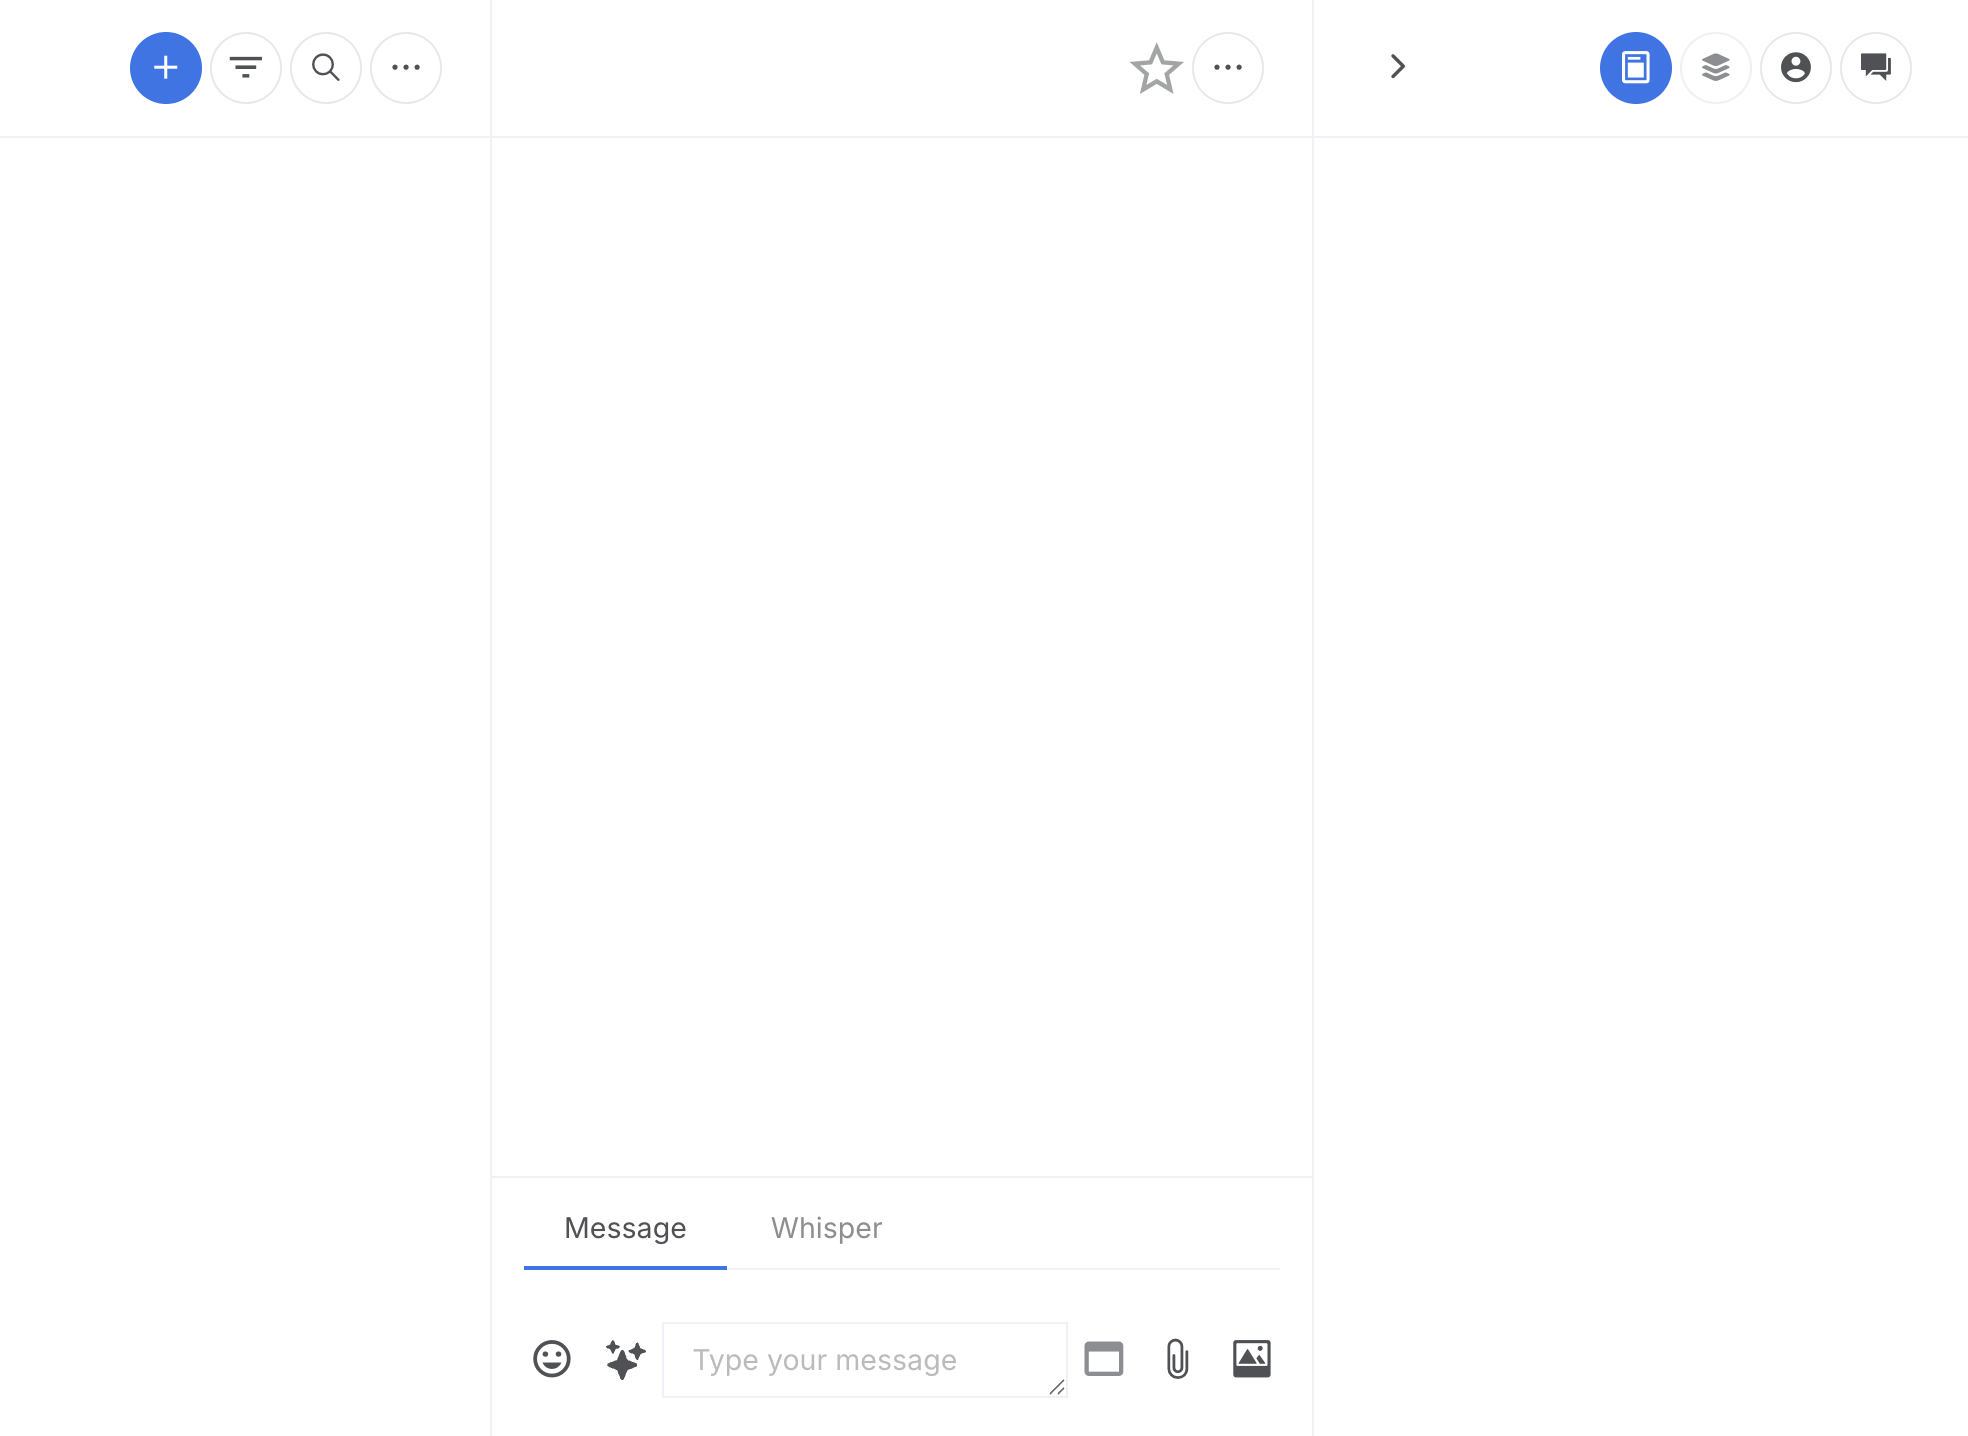
Main Interface
The primary Agent Chat workspace showing all three panels.
Chat List
The Chat List (Left Panel) shows all your active conversations. Starred chats always appear at the top in their own section, followed by the remaining chats in your chosen sort order.
Click on any chat to select it. The conversation history will load in the Conversation Area (Center), and the customer's profile and notes will appear in the User Details Panel (Right).
Create New Outbound Chat
Start a new outbound conversation via SMS or WhatsApp.
Steps:
- Click the + (plus) button at the top of the chat list.
- If you have multiple SMS or WhatsApp channels configured, select the channel from the dropdown.
- Enter the customer's international phone number.
- Optionally enter the customer's email address, first name, and last name.
- Click New Chat to start the conversation.
- Phone numbers must be in international format (e.g., +1234567890).
- On the mobile app, you can use the contacts button to select a contact from your device.
- Some organizations require email and name fields to be completed before starting a chat.
Search Open Chats
Search for messages or users across all your open chats.
Steps:
- Click the Search icon next to the menu button.
- Type your search term in the search box.
- Results will show matching users and messages.
- Click a result to open that chat and jump to the relevant message.
Filter by User Tag
Filter your chat list to show only customers with specific tags.
Steps:
- Click the Filter icon (funnel) in the chat list header.
- Select one or more tags from the dropdown.
- Only chats with customers matching those tags will be shown.
- Clear the selection to show all chats again.
- This feature is only available if User Tags are enabled for your organization.
Sort Chats
Change the order in which chats appear in your list.
Steps:
- Click the More menu (three dots) in the chat list header.
- Under Sort Chats By, select your preferred sort option.
| Sort Option | Description |
|---|---|
| Newest First | Most recently active chats appear first (default). |
| Oldest First | Least recently active chats appear first. Combine with the Show only chats awaiting your reply filter to put your longest-waiting customers at the top of the list. |
| By User Name (A-Z) | Alphabetically by customer name, ascending. |
| By User Name (Z-A) | Alphabetically by customer name, descending. |
- Starred chats always appear at the top regardless of sort order.
- Sort and filter are independent: every sort respects whichever filters you have on, and every filter respects your chosen sort order.
Star/Pin a Chat
Pin important chats to the top of your list for quick access.
Steps:
- Open the chat and click the Star icon (outline star) in the chat header, or right-click the chat row in the list and choose Star.
- The star turns gold and the chat moves to the top of your list.
- Click the star again — or choose Unstar from the right-click menu — to remove the star.
- Press s while a chat is open to toggle its starred state without using the mouse.
Snooze a Chat
Temporarily hide a chat from your list until a later time, so you can focus on other conversations.
- The customer needs time — they're tracking down an order number, checking their email, or speaking to someone else before they can respond.
- You're waiting on another team — billing, engineering, or a supervisor needs to weigh in before you can give a complete answer.
- The customer asked you to follow up later — "Call me back tomorrow morning" or "I'll be ready to chat on Monday."
- An external event needs to happen first — a refund to process, a shipment to arrive, or a scheduled meeting to take place.
- The customer is in a different timezone — there's no point chasing a reply until their working day starts.
Steps:
- Open the chat and click the Snooze icon (moon) in the chat header, or right-click the chat row and choose Snooze….
- Pick one of the preset durations or choose Custom… to set a specific date and time.
Result:
The chat disappears from your default chat list. When you open the chat (or it auto-wakes), a banner shows Snoozed until the chosen time with an Unsnooze button next to it.
The chat returns to your list automatically when the snooze period expires or when the customer sends a new message.
| Preset | Snoozes until |
|---|---|
| 30 minutes | 30 minutes from now |
| 1 hour | 1 hour from now |
| 3 hours | 3 hours from now |
| Tomorrow morning | 8:00 AM tomorrow |
| Next Monday | The start of next Monday |
| Custom… | A date and time you pick from a calendar |
- Press z while a chat is open to start the snooze flow from the keyboard.
- Use the Show snoozed chats filter (moon icon) in the chat list header to see chats that are currently snoozed.
- To wake a chat early, open it and click Unsnooze, or pick a new snooze duration.
Mark a Chat as Unread
Manually mark a chat as unread so it stands out in your list as something you still need to deal with.
Steps:
- Right-click the chat row in the list and choose Mark as Unread, or open the chat and select Mark as Unread from the chat header More menu (three dots).
Result: The chat shows the unread indicator and is treated as unread by sorting and the Show only unread chats filter, until you open it again.
Filter the Chat List
Quickly narrow the chat list to only the chats that need your attention right now.
The chat list header contains three toggle buttons next to the search icon. Click any of them to switch that filter on; click again to turn it off. The button turns filled when active.
| Filter | What it does |
|---|---|
| Show only unread chats (envelope icon) | Hides any chat where you have already read the latest customer message. |
| Show only chats awaiting your reply (hourglass icon) | Shows only chats where the customer's most recent message has not yet been answered. Pair with the Oldest First sort to surface the chats that have been waiting the longest at the top. |
| Show only starred chats (star icon) | Shows only chats you have starred. |
| Show snoozed chats (moon icon) | Switches the list to show your snoozed chats instead of your active ones. Click again to return to the normal list. |
- The Unread, Awaiting Reply, and Starred filters can be combined — turn multiple on to narrow further.
- Filters narrow everything on screen, including the Starred section at the top of the list.
- Show snoozed chats swaps the list to a separate view, so it can't be combined with the other filters — turning it on clears Unread / Awaiting Reply / Starred, and turning any of those on returns you to your active chat list.
Right-Click Chat Actions
Take action on a chat without having to open it first.
Right-click any chat row in your chat list to open a context menu. The actions apply to the chat you right-clicked, even if a different chat is currently open in the conversation area.
| Menu item | What it does |
|---|---|
| Star / Unstar | Toggles the chat's starred state. The label reflects the current state. |
| Snooze… | Opens the custom snooze dialog so you can pick a date and time to snooze this chat until. |
| Mark as Unread | Marks the chat unread so it stands out in your list. |
| Transfer Chat | Hands the chat to another agent. Only shown if you have the Transfer Chat permission. |
| Finish Chat | Closes the chat. Equivalent to the Finish Chat action in the chat header menu. |
Browse Older Chats
Your chat list loads more chats automatically as you scroll. There is no Load More button — just keep scrolling and older chats appear at the bottom of the list.
Conversation Area
The conversation area displays all messages exchanged with the customer. Messages from the customer appear on the left, and your messages appear on the right.
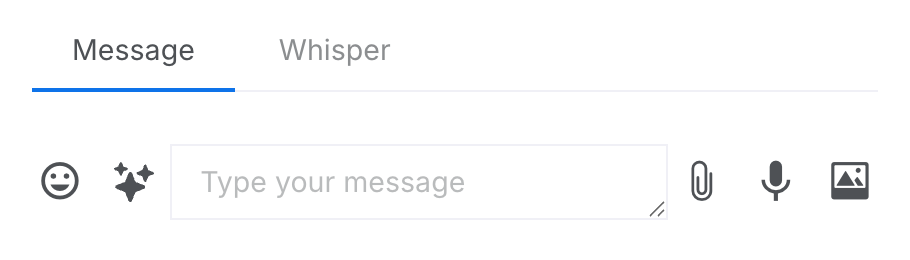
The Message Toolbar at the bottom of the conversation area is where you compose and send messages. It includes a text input field, buttons for attaching images and documents, an emoji picker, AI writing assistance tools, and the send button.
Send a Message
Send a text message to the customer.
Steps:
- Type your message in the text box at the bottom of the chat.
- Press Enter or click the Send button.
- Press Shift + Enter to add a new line without sending.
- The message box will automatically expand as you type longer messages.
- You can manually resize the message box by dragging its corner.
Add an Emoji
Insert emojis into your message to add expression.
Steps:
- Click the Emoji button (smiley face icon) in the message toolbar.
- The emoji picker appears above the message box.
- Browse emoji categories or use the search box to find a specific emoji.
- Click an emoji to insert it at your cursor position in the message.
- Click the Hide button (down arrow) to close the picker.
- You can add multiple emojis without closing the picker.
- The picker remembers your frequently used emojis for quick access.
Use Canned Replies (Hashtags)
Quickly insert pre-written responses using hashtag shortcuts.
Steps:
- In the message box, type # (hashtag) to activate the canned replies dropdown.
- Continue typing after the # to filter replies by hashtag name or content.
- Use ↑ and ↓ arrow keys to navigate the list.
- Press Enter to select and insert the reply into your message.
- Press Esc to close the dropdown without selecting.
- Each reply shows the message text, a delay indicator, and the hashtag shortcut (if assigned).
- Organization-wide replies are created by administrators in the Replies section.
- If you have the Own Replies permission, your personal quick replies also appear in the list.
- Replies can include variables that auto-fill with customer information.
- Click the copy icon next to your personal replies to edit them.
Use Slash Commands
Access quick actions and AI features using slash commands.
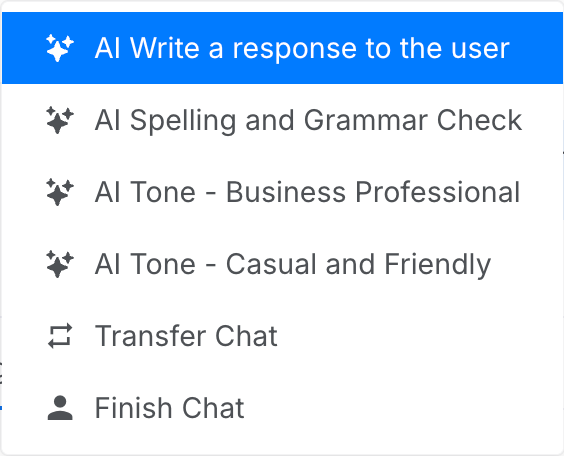
Steps:
- Type / in the message box.
- A menu appears showing available commands, including AI writing tools and chat actions.
- Use ↑ and ↓ arrow keys to navigate.
- Press Enter to select a command, or Esc to close.
| Command | Description |
|---|---|
| AI Write a Response | AI generates a complete response based on the conversation context. |
| AI Spelling and Grammar Check | Checks and corrects spelling and grammar in your typed message. |
| AI Improve (Sales) | Rewrites your message with sales best practices - compelling hooks, clear CTAs, and confident language. |
| AI Improve (Customer Support) | Rewrites your message with support best practices - empathy, clarity, and clear expectations. |
| Transfer Chat | Opens the agent finder to transfer this conversation to another agent or team. |
| Finish Chat | Ends the current conversation with the customer. |
Send an Image
Share an image or photo with the customer.
Steps:
- Click the Image button (picture icon) in the message toolbar.
- Select an image file from your computer.
- Preview the image and click Send to send it.
- Click Cancel (X) to cancel the upload.
Send a Document/Attachment
Share files and documents with the customer.
Steps:
- Click the Attachment button (paperclip icon).
- Select a file from your computer.
- Supported formats include PDF, Word, Excel, PowerPoint, and text files.
- Preview the attachment and click Send.
Send a Voice Message
Record and send a voice message to the customer.
Steps:
- Click the Microphone button.
- Allow browser access to your microphone if prompted.
- Record your message.
- Click Send to send the recording, or Cancel to discard.
WhatsApp Message Templates
Send pre-approved WhatsApp template messages, required when starting or restarting conversations.
Why are templates required for WhatsApp?
WhatsApp has strict rules to protect users from spam. When a customer messages you first, a 24-hour service window opens during which you can send free-form messages just like a normal chat. However, once this window closes (or if you're contacting a customer first), you must use a pre-approved template message.
The key rule: Once the customer replies to you, the 24-hour window resets and you can send normal messages again. Templates are only needed to start or restart a conversation.
Template Warnings
When you click the Template button, the system may display a warning banner if it detects potential issues. These warnings help protect your WhatsApp quality rating.
No Customer Engagement: Appears when the customer has never replied. Sending templates to unengaged customers may be marked as spam, negatively impact your quality rating, or result in rate limiting.
Message Delivery Failed: Appears when your last message failed to deliver. The customer may have blocked your number or is no longer on WhatsApp. Check the error message on the failed message (hover over the red triangle) for details.
Click Choose Template to proceed anyway, or close the warning to reconsider.
Steps:
- Click the Template button in the message toolbar. A modal window opens showing available templates.
- Browse or search for the template you need (e.g., "order update", "appointment reminder"). See WhatsApp Templates for detailed guidance on using the template selector.
- Fill in any required variables (shown as placeholders like {{1}}, {{2}}).
- Preview the message and click Send.
| Scenario | Can Send Free-Form? | Template Required? |
|---|---|---|
| Customer messaged within last 24 hours | Yes | No |
| Customer messaged more than 24 hours ago | No | Yes |
| Starting a new conversation with a customer | No | Yes |
| Following up after customer stops replying | No | Yes |
- After sending a template: Once the customer replies, you can chat normally for 24 hours.
- Templates are pre-approved by WhatsApp to ensure quality - you cannot create them on the fly.
- Common template types include: order confirmations, shipping updates, appointment reminders, and re-engagement messages.
AI Writing Assistant
Boost productivity with AI-powered agent assist features. Use real-time AI assistance to generate responses, correct spelling and grammar, and optimize messages for sales or customer support—helping reduce handle time while maintaining quality.

Steps:
- Click the AI button (sparkle icon) in the message toolbar, or type / in the message input to access AI commands.
- Select an AI action from the dropdown menu:
| AI Action | Description |
|---|---|
| AI Writing Assistant | Opens the full AI Writing Assistant dialog with all improvement options including specialized options for Sales and Customer Support. |
| AI Write a Response | AI generates a complete response by analysing the conversation context and learning from previous agent responses. Capable of answering complex questions, but always review before sending. |
| Spelling and Grammar Check | AI corrects spelling and grammar in your draft without changing the tone or meaning. |
| AI Improve (Sales) | Optimizes your message for sales conversations—adds compelling hooks, clear CTAs, confident language, and removes hedging words. |
| AI Improve (Customer Support) | Optimizes your message for support conversations—adds empathy, simplifies language, and sets clear expectations with specific timelines. |
For additional improvement options like Shorten, Expand, and targeted actions like De-escalate, Show Empathy, and more, open the full AI Writing Assistant dialog.
This feature requires the AI Writing Assistant permission to be enabled.
- When AI generates a response, you can preview it before sending.
- Click Edit Message to modify the AI response before sending.
- Click Send Message to send the AI response directly.
- The menu options apply changes directly. For more control, use the AI Writing Assistant dialog where you can undo changes, apply multiple improvements, and choose from specific goal-based options.
- The UI displays a disclaimer when previewing AI responses. As the agent, you should always review the response for accuracy before sending to the customer.
Delete a Message
Remove a message you sent (if supported by the channel).
Steps:
- Right-click (or long-press on mobile) on a message you sent.
- Select Delete from the context menu.
- Confirm the deletion when prompted.
This feature requires the Delete Message permission.
- Not all messaging channels support message deletion.
- Deleted messages may still be visible to the customer depending on the channel.
React to a Message (WhatsApp)
Add an emoji reaction to a customer's WhatsApp message.
Steps:
- Hover over a message in the conversation.
- A floating action menu appears above the message with quick reaction emojis (👍 ❤️ 😂 😮 😢 😡).
- Click an emoji to add that reaction to the message.
- To choose a different emoji, click the + button to open the full emoji picker.
- To remove your reaction, hover over the message again and click the − button.
Result: The reaction appears as a badge on the message. The customer will see your reaction in their WhatsApp app.
Message reactions are only available for WhatsApp conversations when the 24-hour messaging window is open.
- Reactions are a quick way to acknowledge messages without typing a response.
- You can change your reaction at any time by selecting a different emoji.
- The customer receives a notification when you react to their message.
Reply to a Message (WhatsApp)
Send a contextual reply to a specific message in a WhatsApp conversation.
Steps:
- Hover over the message you want to reply to.
- Click the Reply button (arrow icon) in the floating action menu.
- A preview bar appears above the message input showing the quoted message.
- Type your reply in the message input field.
- Click Send to send your reply.
Result: Your message is sent as a reply linked to the original message. The customer sees your reply with a quote of the original message in their WhatsApp app.
Contextual replies are only available for WhatsApp conversations when the 24-hour messaging window is open.
- Use contextual replies when responding to a specific question or point from the customer.
- To cancel a reply, click the X button on the reply preview bar.
- Contextual replies help maintain clarity in longer conversations by showing which message you're responding to.
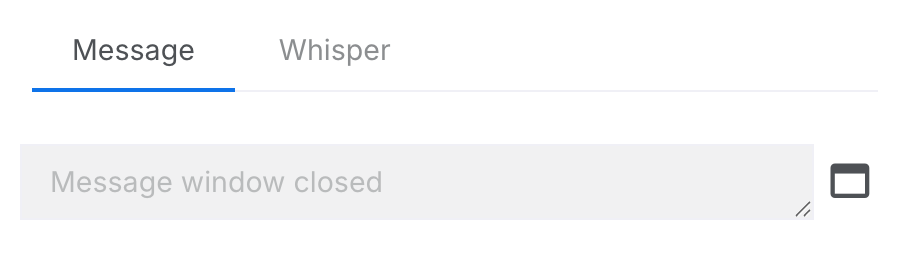
Send a Whisper Message
Send an internal message visible only to other agents (not the customer).
Steps:
- Click the Whisper tab above the message input.
- Type your internal message.
- Click Send to post the whisper.
- Whisper messages appear in a different color in the chat.
- Use whispers to communicate with supervisors or leave notes for other agents.
- Whispers are never shown to the customer.
Search in This Chat
Find specific messages within the current conversation.
Steps:
- Click the More menu (three dots) in the chat header.
- Select Search in this Chat.
- Type your search term.
- Click a result to jump to that message in the conversation.
Chat Header Actions
The chat header displays customer information and provides quick access to important actions. Access the menu by clicking the three-dot icon on the right side of the header.
View Text Transcript
View a plain-text version of the entire conversation.
Steps:
- Click the More menu (three dots) in the chat header.
- Select View Text Transcript.
- The transcript opens in a new dialog.
- You can copy or print the transcript as needed.
Show Bot & User Chat
View the conversation between the bot and user before handover to an agent. This is a global toggle — once enabled, bot messages are visible across all chats and the setting is remembered between sessions.
Steps:
- Click the More menu (three dots) in the chat header.
- Select Show Bot & User Chat.
- The bot log indicator appears in the header. Bot messages are now visible in all chats.
- Click the bot icon in the header to turn off bot messages globally.
This setting applies globally across all chats and persists between sessions. You do not need to enable it for each chat individually.
This feature requires the View Bot Log permission.
Transfer Chat
Transfer the conversation to another agent or department.
Steps:
- Click the More menu (three dots) in the chat header.
- Select Transfer Chat.
- Choose the agent or department to transfer to.
- Optionally add a transfer note explaining the situation.
- Click Transfer to complete the handover.
This feature requires the Transfer Chat permission.
- The receiving agent will see your transfer note.
- The chat will be removed from your list after transfer.
Finish Chat
Close the current conversation when it's resolved.
Steps:
- Click the More menu (three dots) in the chat header.
- Select Finish Chat.
- Confirm when prompted.
- Finishing a chat removes it from your active chat list.
- The conversation history is preserved and can be viewed in Chat History.
- If the customer sends a new message, a new chat session will be created.
Finish All Chats
Close every chat in your active list in one go.
Steps:
- Click the More menu (three dots) in the chat header.
- Select Finish All Chats.
- A dialog shows the number of chats that will be closed. Click Continue to proceed, or Cancel to back out.
- A progress bar shows chats being closed. When it reaches 100%, click Done to dismiss the dialog.
This feature requires the Close All Chats permission.
Close Stale Chats
Close only the chats that have had no activity for a while, leaving your in-progress conversations untouched.
Steps:
- Click the More menu (three dots) in the chat header.
- Select Close Stale Chats.
- Choose a cut-off: 3 days ago, 7 days ago, or Custom (pick a specific date and time — chats with no activity since that point will be closed).
- Click Preview. The dialog shows how many chats match the cut-off.
- Click Continue to close them, or Back to adjust the cut-off.
- A progress bar shows chats being closed. When it reaches 100%, click Done.
This feature requires the Close All Chats permission.
- You can close the dialog at any time while it's in progress — the close job will stop after the current chat finishes.
Block User
Block a user from contacting your organization.
Blocking a user prevents them from contacting your organization. This action should be used carefully and typically only for abusive or spam users.
Steps:
- Click the More menu (three dots) in the chat header.
- Select Block this User.
- Confirm the action when prompted.
This feature requires the Block User permission.
Translate Messages
Translate customer messages and enable auto-translation for the conversation.
Steps:
- Hover over any message from the customer to reveal the message menu (three dots).
- Click the menu icon to open the message options.
- Select Translate and enable auto-translate.
- The selected message is immediately translated, and auto-translate is enabled for this conversation.
This feature requires the AgentChatAllowTranslate permission. If you don't have this permission, the translate options will be disabled in the menu.
Result: Once auto-translate is enabled:
- A Globe icon appears in the chat header indicating translation is active.
- All incoming messages from the customer are automatically translated to your language.
- Your outgoing messages are automatically translated to the customer's language before being sent.
- Translated messages display both the original text and the translation.
- Your language is set in your agent profile settings.
- The system detects the customer's language automatically from their messages.
- Original messages are always preserved - translations appear alongside them.
- Translation quality depends on the languages involved and message complexity.
Change Translation Language
Override the auto-detected language when the customer switches language or the detection is incorrect.
Steps:
- Click the Globe icon in the chat header to open the translation menu.
- The menu shows the current language under Translating to.
- Use the Search language field to filter the list, or scroll to find the language.
- Click the desired language to select it.
Result:
- All outgoing messages are now translated to the selected language.
- A banner confirms the language has been changed.
- The override remains active until you reset it or turn off translation.
- Use this when a customer asks to communicate in a different language mid-conversation.
- The Auto-detect from next message option only appears when you have manually selected a language.
Turn Off Auto-Translate
Disable automatic translation for the current conversation.
Steps:
- Option 1: Click the Globe icon in the chat header, then select Turn off translation.
- Option 2: Hover over any customer message, click the menu, and select Turn off auto translate.
Result: When auto-translate is turned off:
- The Globe icon disappears from the chat header.
- New messages will no longer be automatically translated.
- Previously translated messages remain visible with their translations.
- Your outgoing messages will be sent in your original language without translation.
- Any manual language override is also cleared.
- You can re-enable translation at any time by using the message menu again.
- Translation settings are per-conversation - turning off translation in one chat doesn't affect other chats.
User Details Panel
The User Details Panel appears on the right side of the chat interface and displays comprehensive information about the customer you're chatting with.
The User Details Panel requires the User Panel permission to be visible.
View Customer Information
View and edit customer profile information.
| Field | Description |
|---|---|
| Name | Customer's display name |
| Phone | Phone number (if available) |
| Email address (if provided) | |
| Notes | Agent notes about this customer. Notes are searchable and will appear in search results when matching. |
| Tags | Labels applied to this customer for categorization |
Use Quick Replies
Access standard replies directly from the user panel.
Steps:
- Open the User Details Panel.
- Look for the Replies or Standard Replies section.
- Click a reply to insert it into the message box.
This feature requires the Own Replies permission to create personal replies.
Hide/Show Panel
Collapse or expand the User Details Panel for more chat space.
Steps:
- Click the Arrow button to hide the panel.
- Click the Show Panel button in the header to restore it.
Message Status Indicators
Messages display status indicators to show their delivery state:
| Indicator | Status | Meaning |
|---|---|---|
| ○ | Sending | Message is being sent |
| ✓ | Sent | Message sent to server |
| ✓✓ | Delivered | Message delivered to customer's device |
| ✓✓ | Read | Customer has seen the message |
| ! | Failed | Message could not be delivered. Hover over the red triangle to see the error message. |
Status indicators depend on the messaging channel - not all channels support all statuses. WhatsApp and Webchat show full read receipts; some channels only show sent status.
Inline Chat Information
Within the conversation area, the system displays contextual information markers that provide details about chat sessions and AI analysis. These inline elements help you understand the history and context of conversations.
Chat Activity Markers
View details about when chats started, ended, and key metrics for each conversation session.
Chat Activity Markers appear as horizontal lines within the conversation history, marking the start and end of each chat session. These markers show at a glance whether a chat was inbound, outbound, or transferred, along with a sentiment indicator if AI analysis is enabled.
Steps:
- Look for the horizontal marker lines in the conversation area—these appear at the start and end of each chat session.
- The marker displays an icon indicating the chat type:
- Arrow pointing right — Inbound chat (customer initiated)
- Arrow pointing left — Outbound chat (agent initiated)
- Repeat/loop icon — Transferred chat
- If sentiment analysis is enabled, a face icon appears next to the chat type:
- Green happy face — Positive sentiment
- Grey happy face — Neutral sentiment
- Red sad face — Negative sentiment
- Click on any marker to expand and view detailed information about that chat session.
When you click on a Chat Activity Marker, the following details are displayed:
| Field | Description |
|---|---|
| Chat Summary | AI-generated summary of the conversation (if AI analysis is enabled) |
| Sentiment | Overall sentiment of the conversation: Positive, Neutral, or Negative |
| Emotions Expressed by the User | Specific emotions detected in the customer's messages (e.g., Frustration, Satisfaction, Confusion) |
| AI Chat Tags | Automatically assigned topic or category tags based on conversation content |
| AI CSAT | AI-predicted customer satisfaction score: Very Satisfied, Satisfied, Neutral, Dissatisfied, or Very Dissatisfied. Hover over the badge to see the confidence level (High, Medium, or Low) and reasoning. |
| Open Reason | How the chat was initiated:
|
| Close Reason | How the chat ended:
|
| Requested Time | When the chat request was created. For inbound chats, this is when the customer first requested to speak with an agent. For outbound chats initiated by an agent, this is the same as the Allocated Time. |
| Allocated Time | When the chat was assigned to an agent. For inbound chats, this may be later than Requested Time if the customer waited in a queue. For outbound chats, this is set immediately when the agent initiates the conversation. |
| Allocated Agent | The agent who handled this chat session. For transferred chats, this shows the agent who received the transfer. |
| End Time | When the chat session was closed |
| Queue Wait Time | Time between Requested Time and Allocated Time. This represents how long the customer waited in the queue before being connected to an agent. For outbound chats initiated by agents, this is typically zero or not shown. For missed chats, this shows "Queue wait time (missed chat)" — the time the customer waited before leaving. |
| Agent First Response | Time between Allocated Time and the agent's first message. This measures how quickly the agent responded after being assigned the chat. For outbound chats, this is the time between initiating the conversation and sending the first message. |
| Total Wait Time | Time from Requested Time to the agent's first response. This is the total time the customer waited from initial request to receiving a reply — combining both queue wait time and agent response time. For outbound chats, this equals the Agent First Response time. |
| Duration | Length of the active conversation from the agent's first message to chat close |
| Chat Tags | Manually assigned tags for this chat session (if chat tagging is enabled). Tags can be added during or after the conversation. |
- Use Chat Activity Markers to quickly review conversation history when a customer returns
- Check the Queue Wait Time and Agent First Response metrics to understand customer experience
- For outbound chats you initiated, Queue Wait Time will be zero since the customer didn't wait — focus on Agent First Response and Duration instead
- For transferred chats, the metrics reflect only the current agent's session — previous agent sessions have their own activity markers
- Review AI-detected emotions and sentiment to gauge how the conversation went
- Click the marker again to collapse the details panel
AI Chat Summary
View AI-generated conversation insights including sentiment, emotions, satisfaction prediction, and a summary of the discussion.
When AI analysis is enabled, an AI Chat Summary panel appears after a chat session ends. This provides a quick overview of the conversation without needing to read through all the messages.
Steps:
- Look for the panel with the sparkle icon and "AI Chat Summary" header after a chat closes.
- The summary header shows the date range of the conversation.
- Click the up/down arrow in the header to collapse or expand the summary panel.
The AI Chat Summary displays the following information:
| Element | Description |
|---|---|
| Sentiment Icon | A large face icon indicating overall sentiment:
|
| Emotions | Badges showing specific emotions detected in the conversation (e.g., Appreciation, Frustration, Curiosity). Shows "No emotions detected" if none were identified. |
| AI CSAT | Predicted customer satisfaction displayed as a colored badge:
|
| Summary Text | A concise AI-generated description of what was discussed and the outcome of the conversation |
| AI Chat Tags | Topic and category tags automatically assigned based on conversation content, displayed as badges |
- Use the AI Chat Summary to quickly understand past conversations when a customer returns
- Review the AI CSAT prediction to identify conversations that may need follow-up
- The summary panel can be collapsed to save space while keeping the header visible
- AI Chat Tags help you understand common topics across conversations
AI Chat Summary requires AI analysis to be enabled for your organization. The summary appears automatically after each chat session ends. If you don't see AI summaries, contact your administrator.
Keyboard Shortcuts
Use these keyboard shortcuts to work more efficiently. Letter shortcuts only fire when you are not actively typing in a message, input, or text field.
Navigating your chat list
| Shortcut | Action |
|---|---|
| ↓ / j | Move the highlight down one chat in the list. |
| ↑ / k | Move the highlight up one chat in the list. |
| Enter | Open the highlighted chat in the conversation area. |
| Cmd + K / Ctrl + K | Open or close the search panel. |
| Esc | Close the search panel, the tag filter, or the open chat — whichever is currently visible. |
Acting on the chat you have open
| Shortcut | Action |
|---|---|
| s | Toggle the star on the open chat. |
| z | Start the snooze flow for the open chat. |
| e | Finish the open chat (asks for confirmation). |
Composing a message
| Shortcut | Action |
|---|---|
| Enter | Send the message. |
| Shift + Enter | Add a new line in the message without sending. |
| # | Open the canned replies dropdown. |
| / | Open the slash command menu. |
| ↑ / ↓ | Navigate items in the canned replies or slash command menu. |
| Esc | Close the canned reply or slash command menu. |
Permissions Reference
The following features require specific permissions. Contact your administrator if you need access to a feature that is not available to you.
| Permission | Features Enabled |
|---|---|
| AI Writing Assistant | AI menu, auto-response generation, grammar check, tone adjustment |
| Delete Message | Right-click to delete sent messages |
| Transfer Chat | Transfer Chat menu option |
| Close All Chats | Finish All Chats and Close Stale Chats menu options |
| User Panel | Right-side User Details Panel |
| View Bot Log | Show Bot & User Chat menu option |
| Block User | Block this User menu option |
| AgentChatAllowTranslate | Translate messages and enable auto-translate via the message menu |
| Supervisor | Supervised Chats and Open Chats tabs |
| Own Replies | Create personal canned replies |